Measure the vertical drop from your patio door's exterior threshold down to your finished patio surface. That number is your total rise, and everything else, including how many steps you need, what size each riser should be, and whether you need a landing, flows from it. Garden steps from patio doors work best when the rise, tread depth, and landing choices match how your specific door threshold sits above the patio surface. Most back doors sit somewhere between 4 inches and 24 inches above the patio, which means you're typically dealing with one to three steps. Get that measurement right first, and the rest of the design falls into place.
Back Door Steps Down to Patio Ideas: Measure, Build, Improve

Owen Delaney
7 May 2026
Quick measurements to determine your step layout
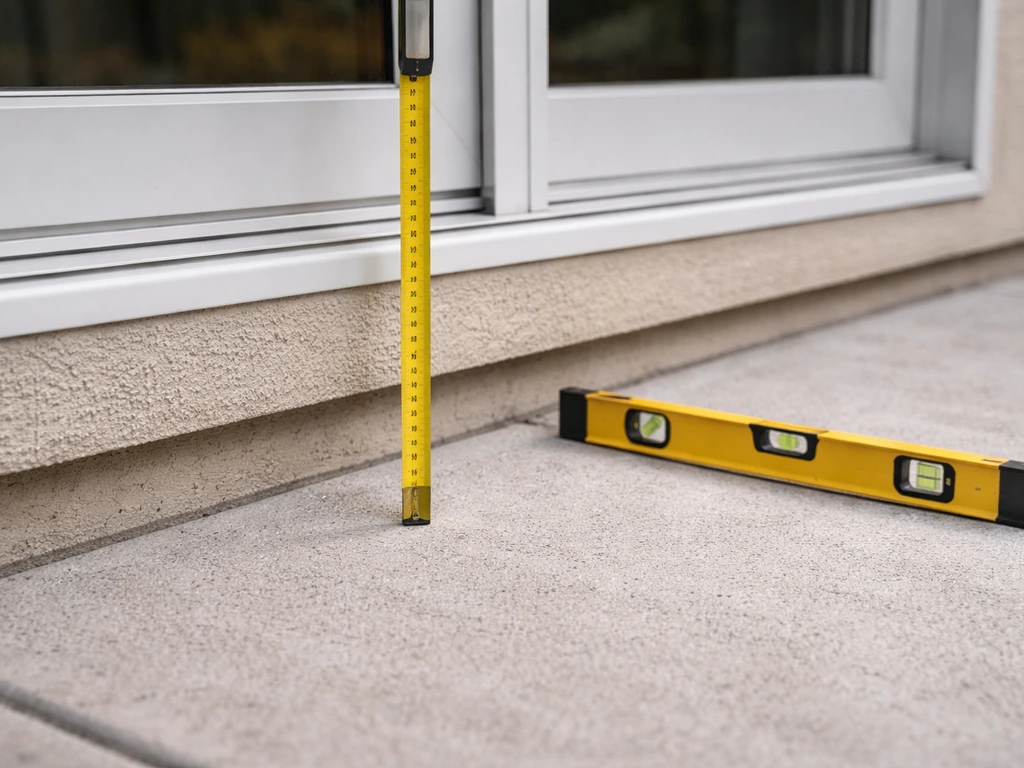
Before you buy a single paver or board, grab a tape measure and a level. Stand outside your back door and measure straight down from the bottom of the door threshold (the flat metal or composite strip the door seals against) to the top of your finished patio surface. That vertical distance is your total rise. Write it down.
If your patio isn't built yet, measure from the threshold down to the ground and subtract your planned patio thickness (typically 4 to 6 inches for a concrete slab, or about 3 to 4 inches for pavers set on a compacted base). That gives you the projected total rise once the patio is in. Getting this wrong is the single most common mistake homeowners make: they build steps to fit the ground, then the patio goes in and the bottom step ends up at an awkward height.
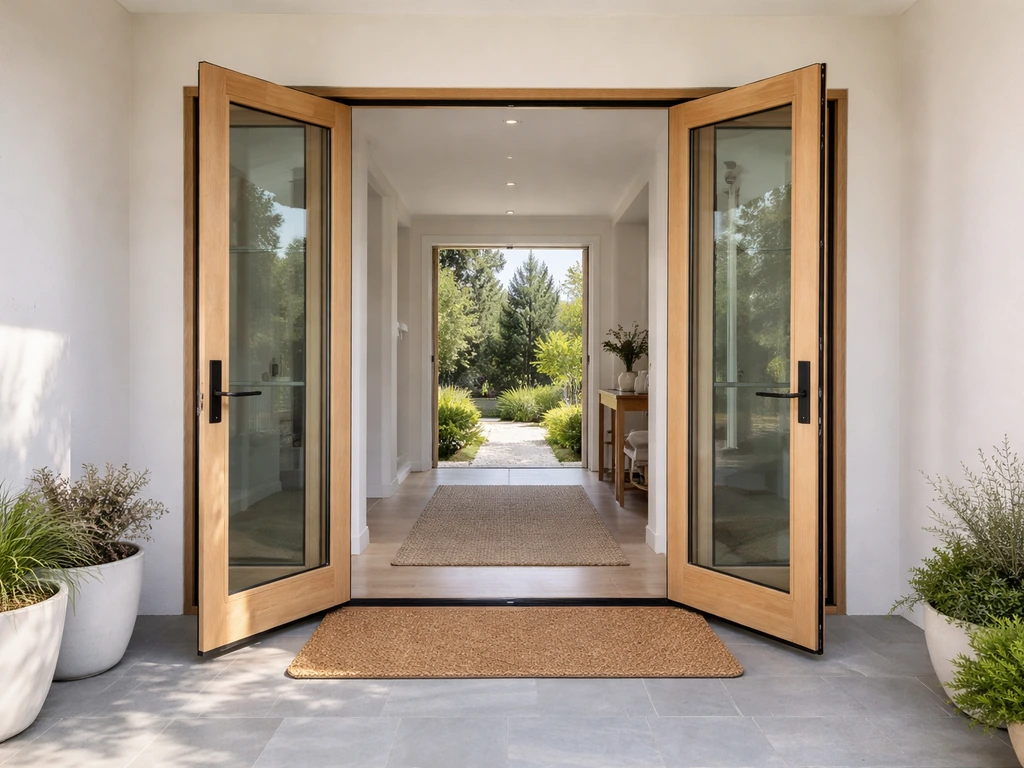
While you're out there, also measure the width of your door opening, including any trim. Your steps should be at least as wide as the door opening, and ideally a few inches wider on each side for a finished, proportional look. Note whether your door swings outward (common on French doors), because a swinging door changes how much clearance you need at the top of the stairway.
- Measure from the bottom of the exterior door threshold straight down to the finished patio surface (or projected finished patio surface). This is your total rise.
- Divide total rise by 7.75 inches (the code maximum riser height) and round up to get the minimum number of risers needed.
- Multiply the number of risers by your chosen riser height (stay between 6 and 7.75 inches for comfort) to confirm it adds up to your total rise.
- Measure door opening width and add at least 6 inches on each side for a comfortable step width.
- Note which direction your door swings: outward-swinging doors need clearance at the top landing or require a landing under certain conditions.
Safe step sizing: rise, run, tread depth, widths, and landings
Under the 2021 International Residential Code (IRC), which most U.S. municipalities adopt in some version, each riser can be no taller than 7-3/4 inches, and each tread must be at least 10 inches deep, measured nose to nose. Those aren't arbitrary numbers. They're the geometry that makes stairs feel natural to climb without straining your knees or catching your toes. For exterior steps, I'd actually push toward a riser closer to 6 to 7 inches and a tread of 11 to 12 inches if space allows. That little bit of extra run makes a real difference on slick, wet pavers in the rain.
Uniformity matters just as much as the individual dimensions. Every riser in a flight should be the same height, within about 3/8 of an inch of each other. If one riser is 6.5 inches and the next is 7.5 inches, someone will trip. This is especially important when you're cutting pavers or setting concrete forms, because small errors compound across the flight.
On the question of landings: the IRC has a practical exception for exterior doors. If you have two risers or fewer on the outside of the door, you don't necessarily need a full landing at the top as long as the door does not swing outward over the stairway. This is helpful for tight situations where a landing would eat into the patio space. But if your door swings out (French doors typically do), you either need that landing or you need to position the steps off to the side so the door arc clears.
| Measurement | Code Minimum/Maximum | Practical Recommendation |
|---|---|---|
| Riser height | Max 7-3/4 in | 6 to 7 in for exterior comfort |
| Tread depth | Min 10 in (nose to nose) | 11 to 12 in for wet/outdoor use |
| Step width | Min 36 in | Same as door width plus 6 in each side |
| Landing depth | Min 36 in (when required) | At least equal to door width |
| Riser variation | Max 3/8 in between any two risers | Cut and set to match as exactly as possible |
Back-door-to-patio step layout options and design ideas
The right layout depends on your total rise, door type, and how you use the space. Here are the configurations that come up most often, along with honest notes on where each works best.
Single step (total rise under 7-3/4 inches)
If your threshold is less than 7-3/4 inches above the patio, a single poured concrete step or a set of large-format pavers stacked to the right height does the job cleanly. This is common when a patio is being added to a home where the threshold was already close to grade. Keep the tread deep enough (12 inches minimum for a standalone step) so it doesn't feel like a hop.
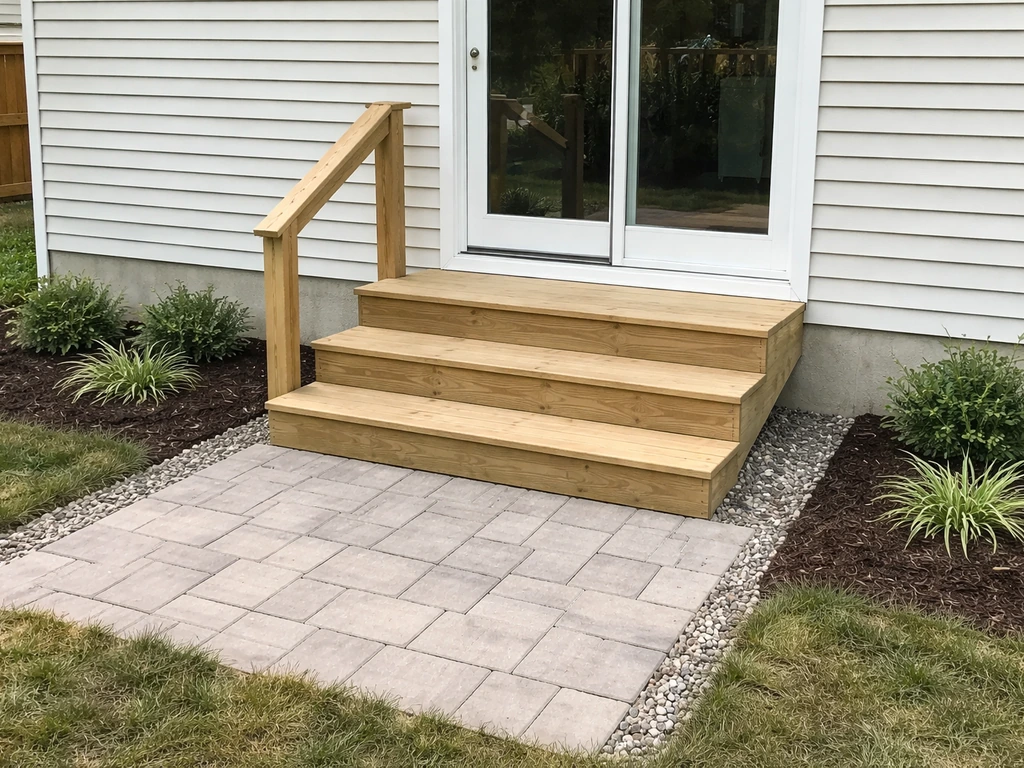
Two steps (total rise 8 to 15 inches)
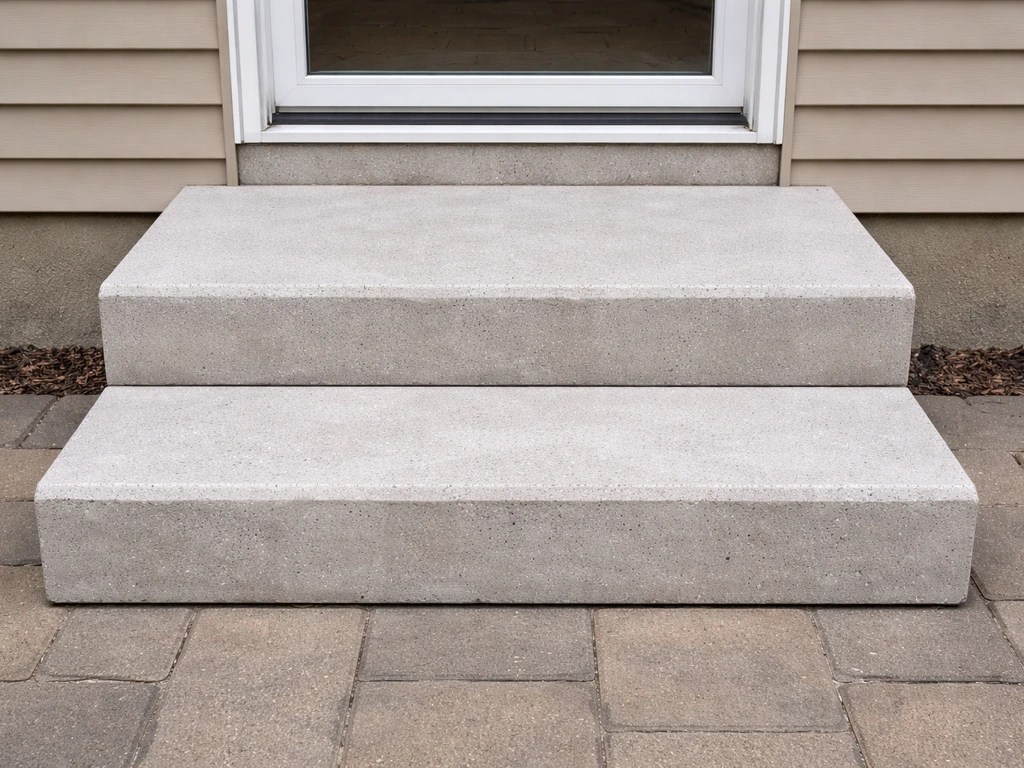
Two-step configurations are probably the most popular for standard back doors. They're easy to build, don't require a handrail in most jurisdictions (handrails are typically required for four or more risers, though check your local code), and look proportional with most doors. Divide the total rise evenly between two risers and aim for treads of 11 to 12 inches. Precast concrete steps in this configuration are available at most home improvement stores and are a fast, cost-effective option.
Three or more steps (total rise over 15 inches)
Three or more steps start to feel like a real stairway and usually need more structural thought. You'll want to plan for a proper footing at the base (especially in freeze-thaw climates), consider whether a landing breaks up the run, and think seriously about a handrail. I'd also widen the steps here, 48 inches or more, so two people can pass comfortably and the stairway doesn't feel like a ladder.
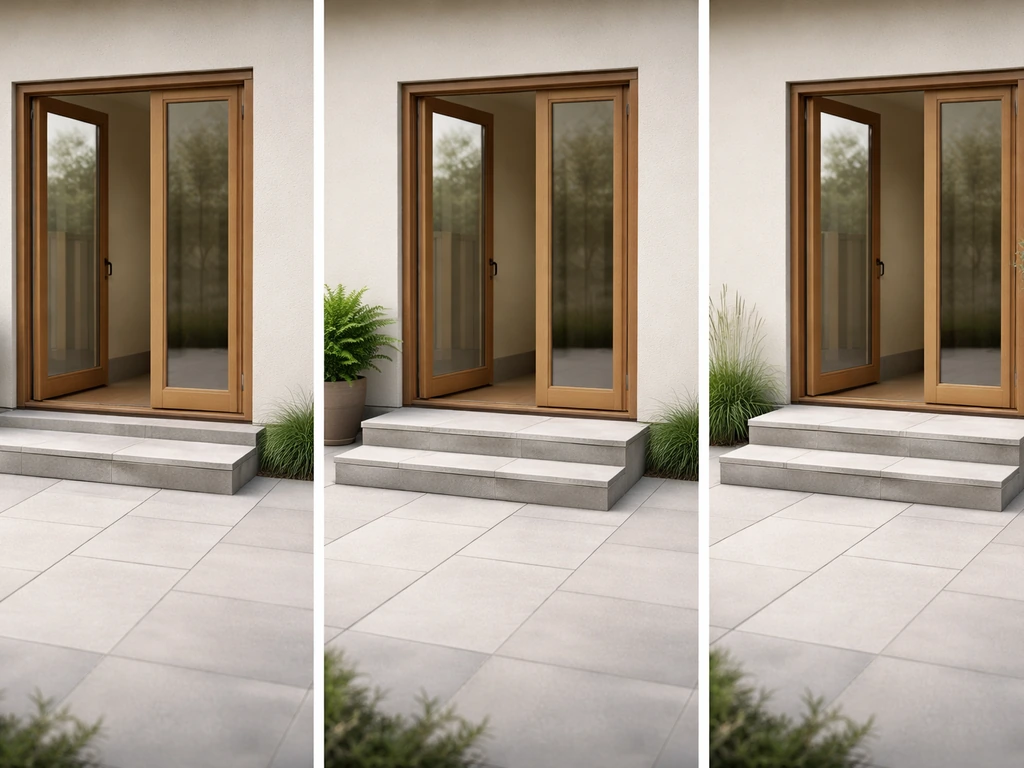
Landing-plus-steps layout
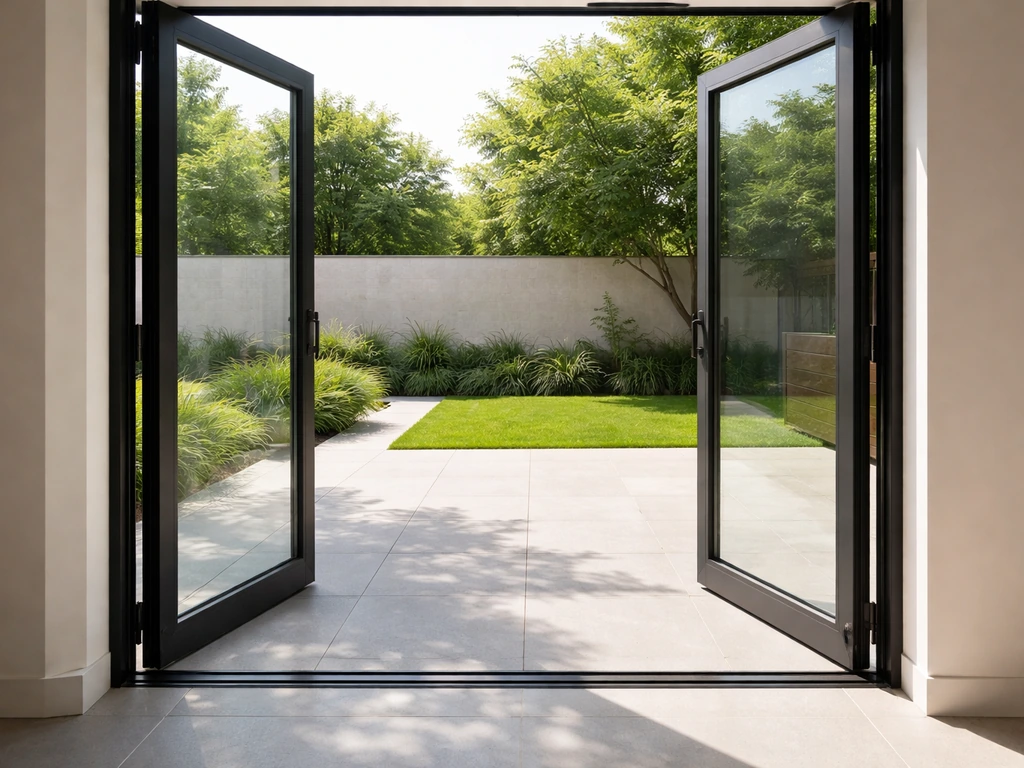
If your patio door is a set of French doors or bifold doors that swing outward, a landing at the door level before the steps descend is the cleanest solution. The landing gives the door room to open fully without sweeping over the top step, which is both a safety issue and a door-swing clearance problem. A landing also makes the transition from interior floor to outdoor steps feel more intentional, especially on wider door openings like bifold patio doors.
Wraparound and curved steps
Wraparound steps, where the treads fan out on both sides of the door centerline, add visual presence to a back door and are a popular design idea for larger patio spaces. They work especially well in natural stone or concrete because those materials can be cut and formed to the arc. The trade-off is cost: forming and pouring curved concrete or hand-cutting stone takes more time and skill. For most homeowners, straight steps with generous width and quality materials will look just as good at half the price.
Materials and durability choices for outdoor steps
Material choice is where a lot of homeowners second-guess themselves. The honest answer is that poured concrete and natural stone hold up the best over decades, while wood looks great initially but demands more maintenance. Here's how the main options stack up for back-door steps specifically.
| Material | Typical Cost (per step, installed) | Lifespan | Maintenance | Best For |
|---|---|---|---|---|
| Poured concrete | $150–$300 | 30–50+ years | Low (seal every few years) | Any climate, most door types |
| Precast concrete | $100–$200 | 20–40 years | Low | Quick installs, standard sizes |
| Natural stone (bluestone, slate, granite) | $250–$600 | 50+ years | Low-moderate (sealing) | High-end aesthetics, durability |
| Concrete pavers | $150–$350 | 25–40 years | Low (occasional resetting) | Matching existing patio pavers |
| Pressure-treated wood | $80–$180 | 10–20 years | Moderate (annual sealing, staining) | Budget builds, temporary setups |
| Composite decking | $150–$300 | 25–30 years | Very low | Deck-adjacent installs, no splinters |
| Brick | $200–$400 | 30–50 years | Low-moderate | Traditional aesthetics, climates without hard freeze-thaw |
In climates with hard winters, freeze-thaw cycling is the main enemy of outdoor steps. Poured concrete can spall (surface pop and chip) if it absorbs water and freezes repeatedly. Use air-entrained concrete mixes and a penetrating sealer to fight this. Natural stone like bluestone or granite handles freeze-thaw much better than concrete. Wood expands and contracts and will eventually check and warp, which is why composite materials have become popular: they look like wood but don't absorb moisture the same way.
If your patio is already pavers, matching the step material to the patio makes the transition look intentional rather than cobbled together. Most paver manufacturers sell step units in complementary sizes. Same goes for if your patio is stamped concrete: a poured and stamped step unit that runs into the slab looks far better than a precast unit plunked in front of it.
Weatherproofing, drainage, and threshold/door alignment
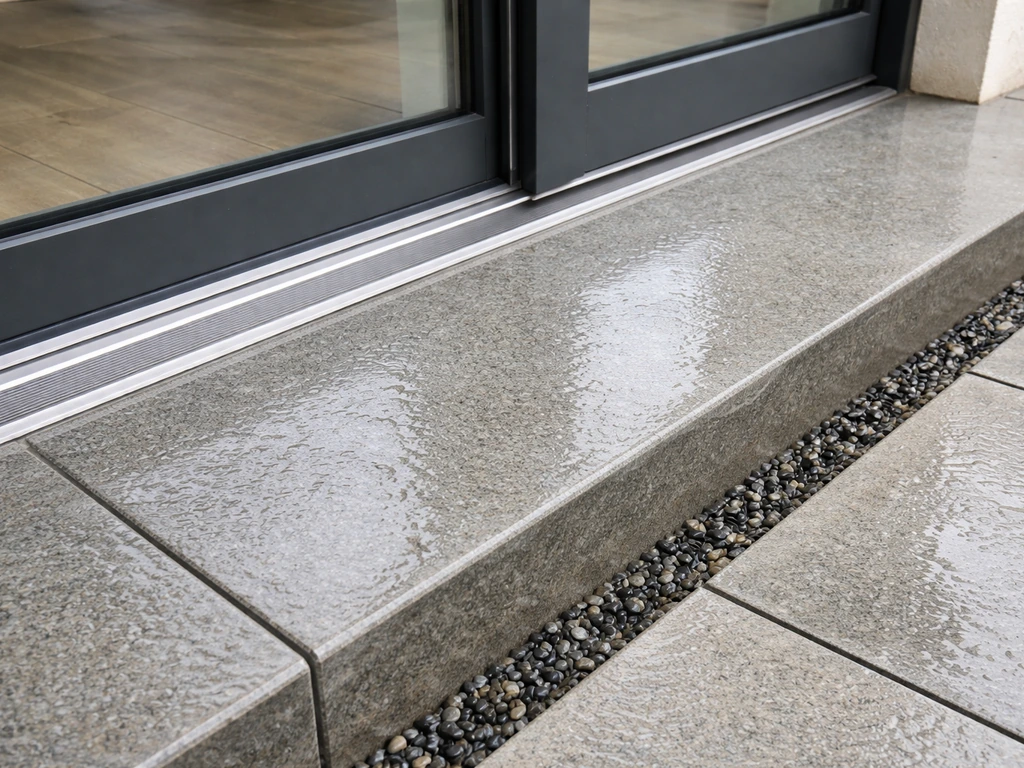
This is where the patio door side of the equation really matters. The step surface directly below your door threshold is the first thing water hits when it rains hard or when snow melts. If that surface isn't sloped away from the house and doesn't drain quickly, water pools against the threshold and eventually works its way under the door, causing rot, mold, and door seal failures.
The top tread of your steps (or the landing) should slope away from the house at a rate of about 1/8 to 1/4 inch per foot. That's barely perceptible underfoot but enough to send water running toward the patio rather than toward the door. Every tread below should also have a slight forward pitch. Don't let any tread be perfectly level or, worse, pitched back toward the house.
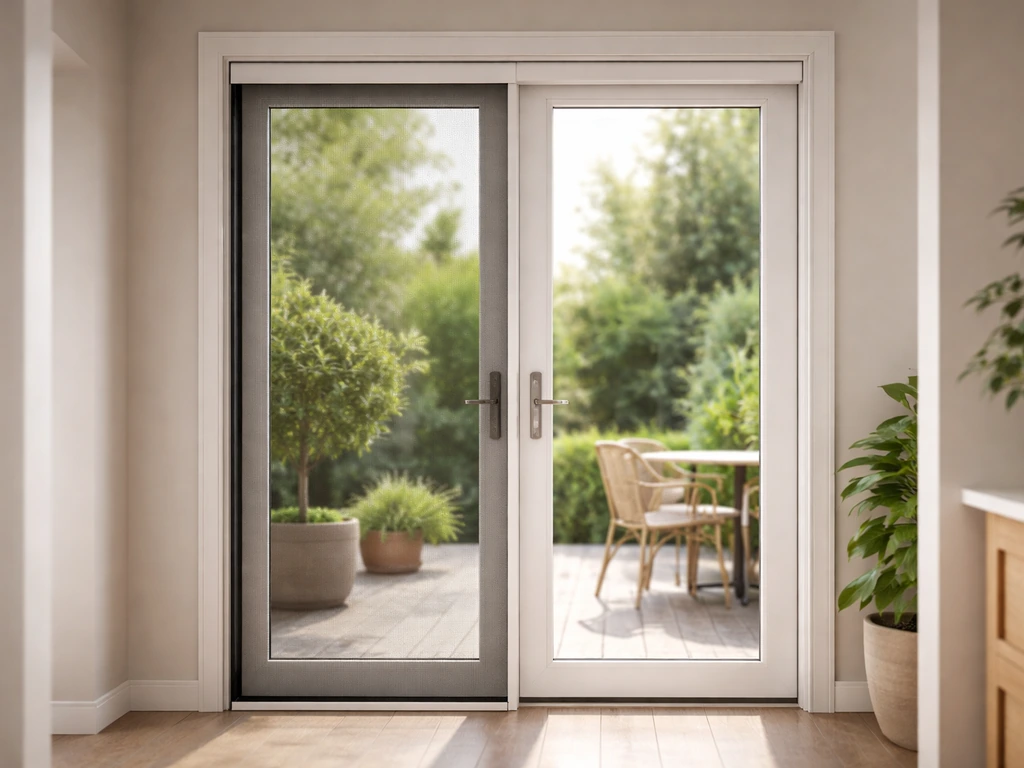
The threshold height matters a lot depending on which door type you have. Sliding patio doors typically have a low threshold that sits very close to the interior floor level, which means the exterior drop to the step or patio is often larger than you'd expect. If you are comparing patio door examples, the step layout you choose can make a big difference in how the transition from indoors to outdoors feels.
When planning the step height and clearance, it helps to understand how a patio door differs from a standard exterior door Sliding patio doors. If you're comparing a garden door to a patio door, focus on their sill height and swing clearance since those directly change the exterior step or landing you need garden door vs patio door.
French doors usually sit at the same threshold height as an exterior door, and bifold patio doors often have a raised sill track. That raised track on bifold doors can actually help you avoid a step entirely if the patio elevation is designed to match it closely. How far the patio surface should sit below the door threshold is a separate design decision that affects drainage and step planning, and it's worth thinking through before you finalize your step count.
If you're installing steps against an existing door, check the threshold condition while you're at it. A worn or damaged threshold gasket lets air and water in even if your steps drain perfectly. Replace it while the area is disturbed. It's a $20 to $60 part that saves you from much bigger problems later.
For sliding and bifold doors with track systems, keep the bottom track clear of debris by ensuring step and landing surfaces don't collect leaves or grit right at the door. A small gap between the step nose and the door frame, combined with good drainage behind it, keeps the track functional and clean.
Handrails, lighting, and accessibility upgrades
Most residential building codes require a graspable handrail when a stairway has four or more risers. For back-door steps that are typically one to three risers, handrails are optional from a code standpoint but not from a practical one. If anyone in your household is older, has balance issues, or you're just thinking long-term about resale, adding a single post-mounted rail to one side costs relatively little and makes the steps significantly safer.
Handrail height should be between 34 and 38 inches measured from the tread nosing, which is the code standard and also genuinely comfortable for most adults. For a two-step configuration, a simple 36-inch steel or wrought iron post with a round graspable rail is the easiest install. For three or more steps, you want rails on at least one side, and ideally both if the stairway is wide enough to need center support.
Lighting at back-door steps is one of the most overlooked upgrades and one of the easiest to add. Low-voltage LED step lights recessed into the riser faces cost $15 to $40 per light and can be run off a simple transformer. Solar-powered riser lights require no wiring at all. Wall-mounted sconces beside the door handle the landing but leave the steps in shadow: in-riser lights solve the actual trip hazard.
For accessibility, a wider step width (48 inches or more) and shallower risers (5 to 6 inches) make a significant difference for anyone using a cane, walker, or moving through with groceries. If you or a family member may eventually need a wheelchair ramp, design the landing now to accommodate a future ramp attachment on one side. A 5-foot-by-5-foot landing gives enough room to turn a wheelchair and is worth the extra concrete if there's any chance you'll need it.
DIY vs hiring a pro: cost factors and next-step checklist
One or two precast concrete steps are a genuine DIY project for most handy homeowners. You're moving heavy objects (a precast step can weigh 200 to 400 pounds, so get help), setting them on a compact gravel base, and making sure they're level side to side and pitched forward slightly. That's manageable on a weekend with the right prep.
Poured concrete steps with formed footings, natural stone installations, or anything requiring three or more steps with a proper footing in a freeze-thaw climate is where I'd strongly recommend hiring a mason or concrete contractor. The footing has to go below the frost line in cold climates, which means digging, forming, and pouring before you even start on the steps. Get that wrong and the steps heave and crack within a season or two. A professional poured-concrete step installation for a standard two-to-three-step run typically costs $800 to $2,500 depending on size, complexity, and region.
Paver steps split the difference well. Laying pavers is a learnable skill, the materials are forgiving (you can adjust), and the results look polished. If you're already matching an existing paver patio, a skilled DIYer can absolutely tackle this. Budget about $300 to $700 in materials for a two-step paver configuration, plus a weekend of work.
Before you start anything, here's a practical checklist to work through today:
- Measure total rise from door threshold to finished patio surface (or projected patio surface if not yet built).
- Calculate number of risers needed by dividing total rise by your target riser height (stay at or below 7.75 inches).
- Check your door type (sliding, French, bifold) and note if it swings outward, which affects landing requirements.
- Measure step width needed based on door opening width, and add at least 6 inches per side for aesthetics and safety.
- Decide on material based on your climate, existing patio material, budget, and whether you're DIYing or hiring.
- Check local permit requirements: many municipalities require a permit for any structural step or stair work.
- Plan drainage slope on every tread (1/8 to 1/4 inch per foot, pitching away from the house).
- Inspect your existing door threshold for wear and replace the gasket now if needed.
- Decide on railing: add one even if not code-required if anyone in the household will benefit from it.
- Plan for step lighting before the steps are built so you can run conduit or position solar lights correctly.
- Get at least two quotes if hiring a pro, and ask specifically whether the quote includes footing work.
Building or upgrading back-door steps is one of the more rewarding home projects because the payoff is immediate and daily. You use them every time you walk in and out. Getting the measurements right, picking a material that matches your climate and patio, and thinking about drainage at the door threshold will make them safe, good-looking, and maintenance-light for years. Start with your tape measure and that total rise number, and the rest of the decisions get much easier from there. If you're also replacing the patio door itself, use a patio door buying guide to compare threshold height, door swing, and clearance needs before you finalize the steps.
FAQ
What if my total rise does not divide evenly into 2 or 3 steps within code limits?
If your rise-to-step count math lands you at a riser that exceeds the 7-3/4 inch maximum, do not just reduce the number of steps. Recalculate using a new riser height target (for example, split the rise across three smaller risers), and verify each tread still meets the 10 inch minimum. When space is tight, a landing that shortens the straight run is usually easier than forcing an out-of-code riser height.
Can I adjust one step height to “make it fit” on an existing patio?
Yes, but only if you maintain drainage and consistent geometry. Instead of cutting one “jumbo” tread to fake the height, adjust riser heights across the whole run so every riser stays within about 3/8 inch of the others. Also make sure the top surface (or landing) still slopes away from the house, otherwise you can create a water path that undermines the threshold.
How should I handle expansion joints where the steps meet the patio slab or walkway?
For outdoor stairs that connect to a deck, porch, or patio slab that can move seasonally, use flexible, exterior-rated joints at the edges where the step meets the walkway. Plan for a small expansion gap between pavers or concrete edges and the adjoining slab, and avoid rigid grouting right up to the door threshold area because it can crack and hold water.
What is the best way to get the required slope if my steps are made of pavers?
For paver steps, a simple rule is to stop the top tread so it lands flat and stable underfoot, then slope the tread surface slightly away from the house. Do not rely on “tilting” the whole paver step structure to create slope, instead shape the base to get the pitch while keeping risers uniform. If you see rocking, reset the bedding sand and compacted base rather than adding shims.
How do I confirm the door will clear the top step, not just the landing height?
Use the door clearance test. Open the door fully and watch whether the lowest point of the door arc would pass over the top step or landing. For outward-swinging French doors, a landing at the door level is typically the safest fix, or you can offset the stair run to the side so the door swings through without sweeping over the stair top.
Can I lower the patio or steps without creating drainage problems at the door threshold?
Yes, but check drainage first. A recessed or flush threshold can trap water against the step nose, especially if the step tread slope is wrong or the gap collects grit. Before rebuilding, clear and inspect the area under the threshold, confirm the step top tread pitches 1/8 to 1/4 inch per foot away from the house, and replace a damaged threshold gasket while the steps are disturbed.
What are common freeze-thaw mistakes that cause outdoor steps to fail early?
In freeze-thaw areas, avoid toe kicks, flat “water bowls,” and unsealed porous stone surfaces that absorb water. Use air-entrained concrete if you pour, apply an appropriate penetrating sealer on concrete after curing, and consider a stone with proven freeze-thaw durability. Also leave a clean path for water to exit, such as a properly sloped grade and no blocked weep areas near the door.
How wide should the stairs be if I plan for mobility or future ramp use?
Start by measuring where feet land, not just overall width at the door opening. Make sure the treads provide enough clear usable surface depth and that the handrail, if added, does not reduce the walking surface too much. For practical safety, consider 36 to 42 inch width for one person comfort and 48 inches or more if two people might pass, or if you want easier future accessibility.
Where should I place lighting so it actually improves safety at night?
Lighting that works best is the kind that reveals the stair nosing. In-riser lights are effective because they reduce the trip hazard, while wall sconces near the door often leave the steps in shadow. For wired low-voltage systems, plan cable routing so it stays protected beneath or behind the finished surface and does not sit where pavers will shift.
If my run is only two or three steps, should I still add a handrail, and how high should it be?
A helpful quick check is the “grip point” location. If you add a handrail, mount it so the top of the graspable surface is about 34 to 38 inches above the tread nosing, and ensure the rail is continuous across the full flight. For short runs, one post-mounted rail on the safer side for your household is often enough.