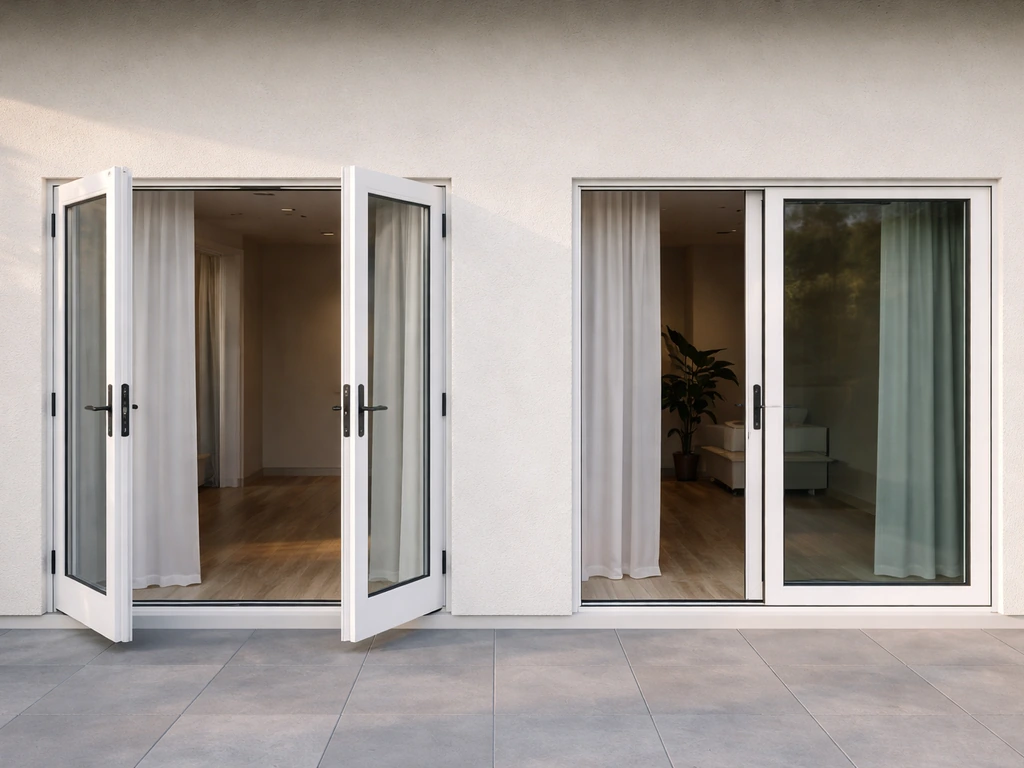
A manual retractable patio screen is a spring-tensioned mesh screen mounted to your patio door frame that you pull out by hand when you want it and let snap back into its housing when you don't. No motor, no remote, no wiring. You measure your door opening, order the right size, mount the cassette housing to the frame, and operate it with a handle. It keeps bugs out, lets air through, and disappears completely when not in use. If that's what you need, this guide walks you through every step: measuring, choosing, buying, installing, and keeping it working.
Manual Retractable Patio Screen Guide: Size, Buy, Install, Maintain

Owen Delaney
1 May 2026
What a manual retractable patio screen actually is (and how it compares to motorized)
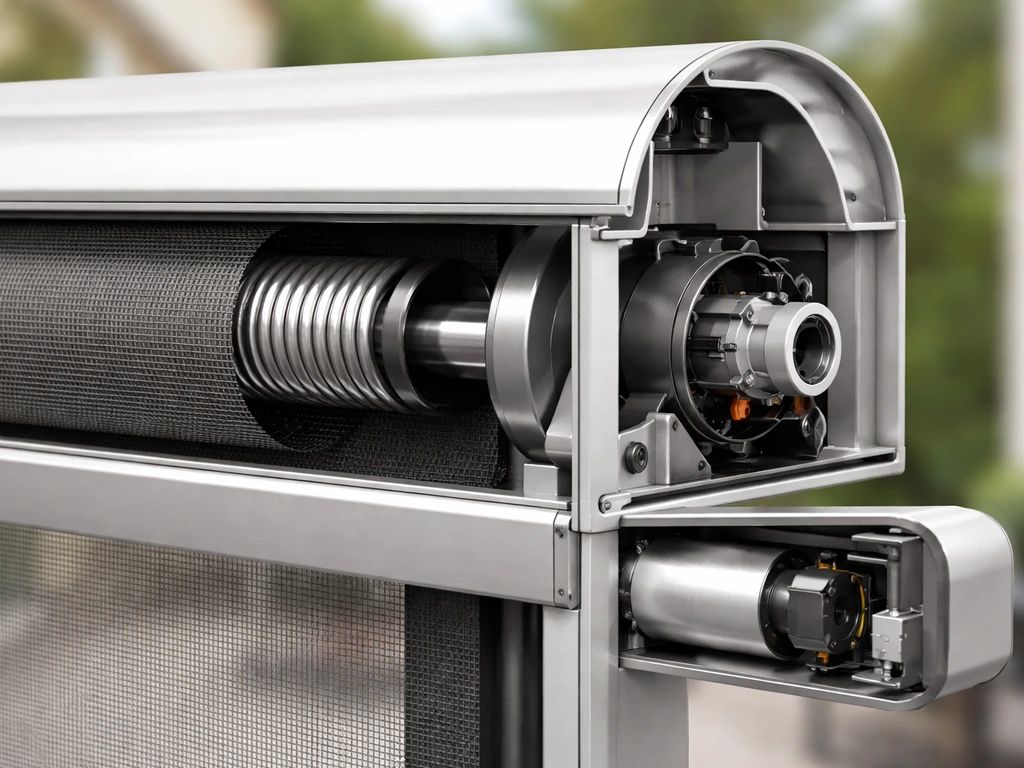
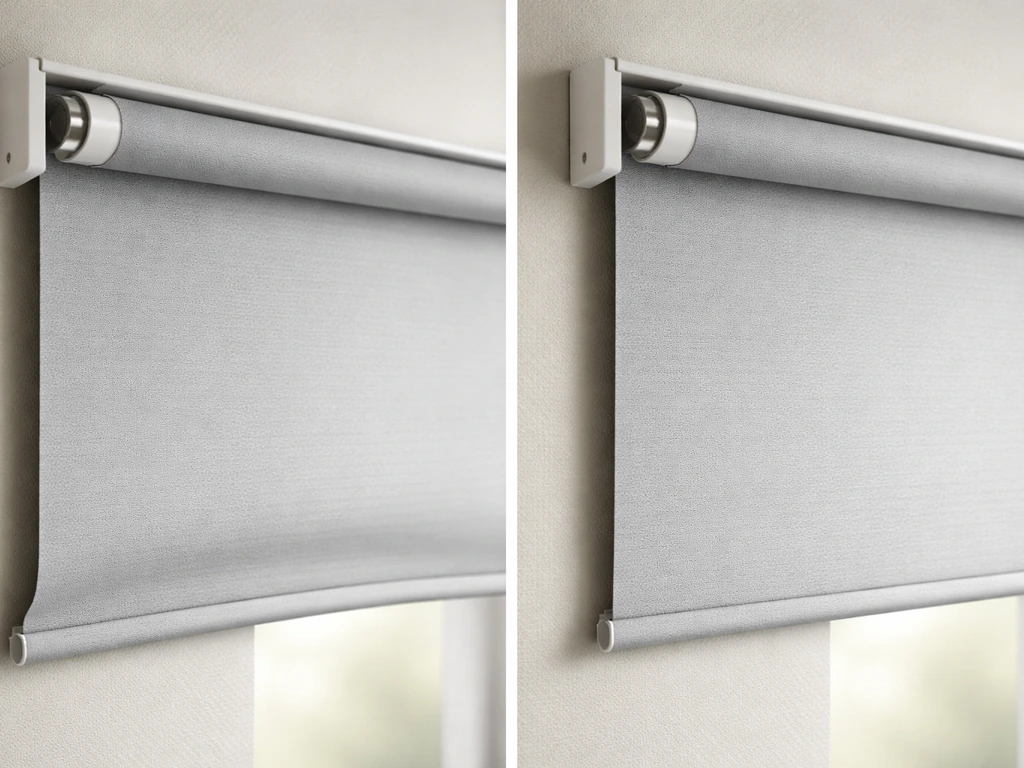
The core mechanism is simple. A rolled mesh screen sits inside an aluminum cassette housing. A coiled spring inside the roller provides the tension that retracts the screen when you let go of the handle. You pull the handle across the door opening, the mesh travels along guide channels or cables on the top and bottom (and sometimes the sides), and a latch or lock holds it in the extended position so it doesn't snap back while you're using the door. Heartland's installation instructions, for example, specify that you position the handle so the lock faces the interior side of the door. When you're done, you release the latch and the spring tension pulls the screen back into the cassette.
Motorized retractable screens work on the same principle but replace the spring tension with an electric motor, usually 12V or 24V, that you trigger with a wall switch, remote, or home automation system. That adds convenience, especially on large openings (think wide bifold or sliding patio door setups), but it also adds cost, wiring requirements, motor maintenance, and points of failure that don't exist on a purely mechanical system. For a standard single or double patio door, a manual screen does the job without any of that complexity. The honest trade-off: you lose the "hands-free" convenience and the ability to integrate with smart home systems. You gain simplicity, lower cost, and a product you can service yourself.
| Feature | Manual Retractable | Motorized Retractable |
|---|---|---|
| Operation | Pull handle by hand, latch to hold | Wall switch, remote, or app |
| Typical cost (door-width unit) | $150–$600 installed | $800–$3,000+ installed |
| Power required | None | Electrical wiring or battery pack |
| Maintenance complexity | Low (spring, tracks, mesh) | Higher (motor, controls, spring) |
| Best for | Single/double patio doors, budget installs | Wide openings, high-use situations |
| DIY-friendly | Yes, for most homeowners | Usually needs an electrician |
If you're also considering a retractable bug screen specifically for pest control, or looking at a manual retractable awning to pair with shade coverage, those are related decisions worth thinking through alongside your screen choice, since the mounting locations can sometimes conflict. If you're also considering a retractable bug screen specifically for pest control, or looking at a manual retractable awning to pair with shade coverage, those are related decisions worth thinking through alongside your screen choice, since the mounting locations can sometimes conflict, and it's especially relevant when you're comparing retractable bug screens for patio setups. If you are pairing the shade of a manual retractable patio awning with a screen, make sure the mounting points and clearances do not interfere with each other manual retractable awning.
Measuring your patio door opening correctly
This is where most DIY installs go wrong. You need three separate measurements, and you need to take them carefully before you order anything.
The three measurements you need

- Opening width: Measure the width of the door frame opening at both the top and bottom. If they differ (common in older homes), use the smaller of the two dimensions. This is the measurement manufacturers like Casper use to determine your screen width, measured to the nearest 1/16 inch.
- Opening height: Measure the mounting surface height, again to the nearest 1/16 inch. This controls the cassette housing length.
- Clearance depth: Check how much flat, clear space you have on the door frame where the cassette housing will mount. Casper's installation specs, for example, require at least 1 inch of clearance on the hinged side and at least 15/16 inch on the other sides. If you have decorative trim, weatherstripping, or a door stop that eats into that space, you'll need to account for it or remove the obstruction.
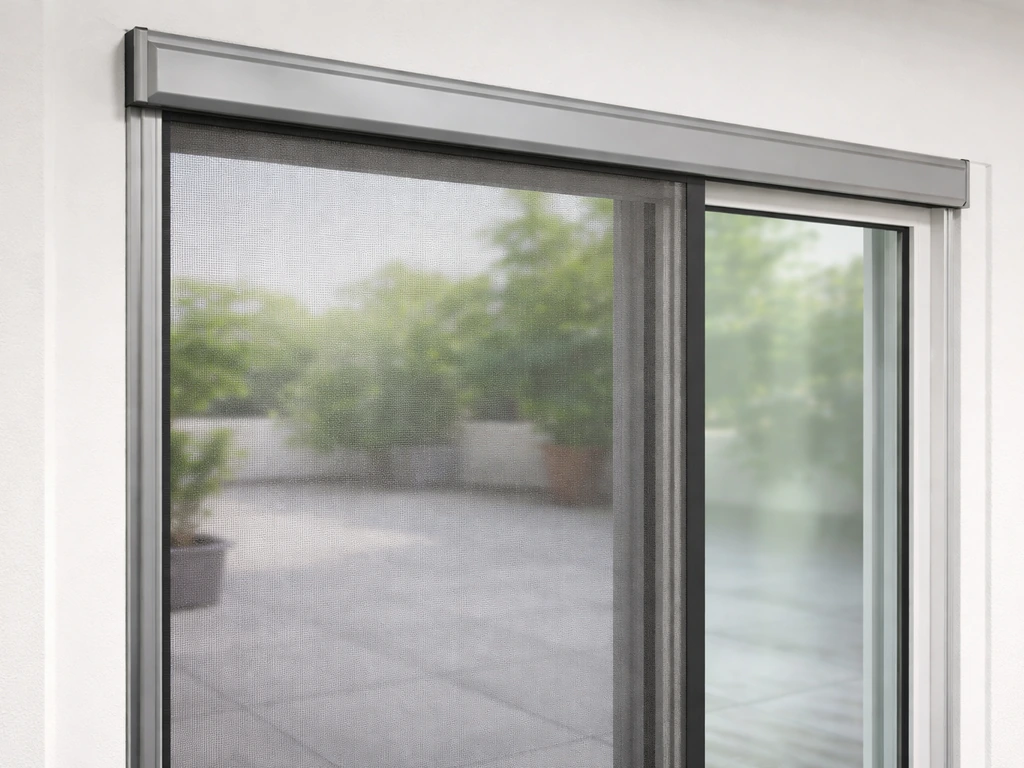
Most retractable screen cassettes mount on the outside face of the door frame (called face-mount or surface-mount). Some systems offer in-jamb mounting, which tucks the cassette inside the frame recess for a cleaner look, but that requires even more precise clearance measurements. Larson's Brisa retractable screen line, for instance, specifically describes face-mount as the option that creates a full, unobstructed opening and avoids the tight clearance issues of in-jamb tracks. If you're unsure, face-mount is the more forgiving choice.
Write all three measurements down before you shop. Bring them in-store or have them ready when browsing online. Many retailers offer sizing kits or guides on their product pages. If your opening falls between standard sizes, you'll typically order to the next size up and trim the guide channels (most aluminum track systems allow this).
How to choose the right manual retractable patio screen
Once you have your measurements, you're choosing based on five things: mesh type, frame and hardware quality, track design, how well it handles weather, and how easy it is to actually use day-to-day.
Mesh type
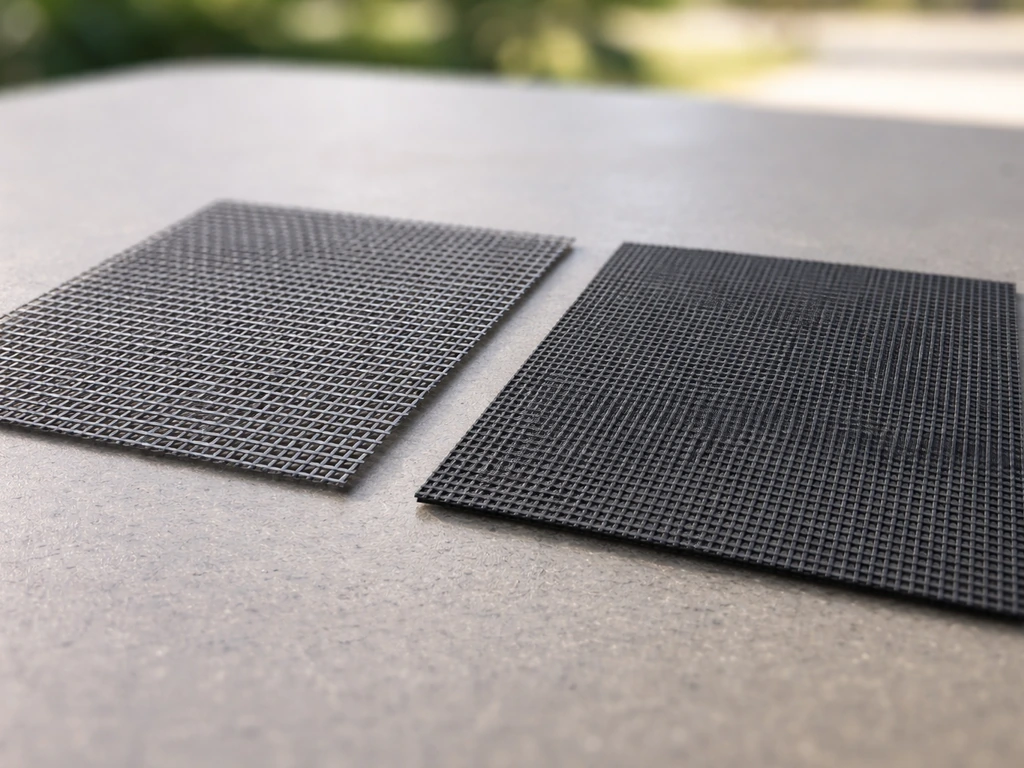
Standard fiberglass mesh (typically 18x16 weave) is the baseline. It's inexpensive, flexible, and easy to replace. Solar or shade mesh has a tighter, denser weave that reduces glare and some heat gain but cuts airflow and visibility. If your goal is insect screening at a patio door, standard fiberglass is the right call. If you have pets, look specifically for pet-resistant mesh, which is a heavier-gauge polyester or vinyl-coated fiberglass designed to resist claw punctures. It's stiffer and harder to retract smoothly, so check that the spring mechanism in the roller is rated for heavier mesh.
Frame and hardware quality
Aluminum frames with a powder-coated finish are the standard for exterior patio screens, and for good reason. Systems like SunSetter's EasyScreen use powder-coated aluminum frames specifically to avoid rust and eliminate the need for painting. A reinforced, weighted bottom hem bar is also worth looking for. It keeps the mesh taut under the screen's own weight and adds wind resistance. Flimsy bottom bars are one of the first things that fail on cheaper screens, causing sag and billowing. If a product description doesn't mention the bottom bar construction, ask.
Track and guide system
There are two main systems: channel-guided (the mesh edges run in grooved aluminum tracks on the top and bottom, or all four sides) and cable-guided (thin stainless cables run top-to-bottom and the mesh travels along them). Channel-guided systems are more contained and tend to hold up better in wind. Cable-guided systems like SunSetter's EasyScreen are easier to install and look cleaner, but the mesh has more lateral movement in a strong breeze. For a covered patio or screened-in area, either works. For an exposed, windy location, channel-guided is the better choice.
Ease of operation and locking
The handle design matters more than people expect. Patio door handles on retractable screen systems are not always the same size or type, so it helps to confirm whether they’re universal for your exact model. A well-designed handle has a smooth grip and a reliable latch that keeps the screen extended without you having to hold it. A poor latch lets the screen creep back or snap back unexpectedly. Test the retraction feel if you're buying in-store. The spring tension should pull the screen back fully and smoothly without slamming. If you're ordering online, look for reviews that specifically mention the retraction feel after a year or two of use.
Quick selection guide by situation
| Situation | What to prioritize |
|---|---|
| Standard patio door, average budget | Standard fiberglass mesh, channel-guided tracks, powder-coated aluminum frame |
| Pets (dogs, cats) | Heavy pet-resistant mesh, strong bottom hem bar, robust spring tension |
| High-wind exposed location | Channel-guided 4-sided tracks, weighted hem bar, surface-mount cassette |
| Large sliding or French door opening | Dual or stacking panel system, verify spring is rated for wider span |
| Clean/minimal look | Face-mount cassette with color-matched frame, cable-guided option |
DIY install vs. hiring a pro: what's actually involved
Most standard-width manual retractable screens (up to around 36 inches) are genuinely DIY-friendly. The job involves mounting the cassette housing to the door frame, installing the guide tracks or cables, attaching the bottom guide, and then tensioning the spring roller correctly. You need a drill, a level, a tape measure, the right fasteners for your frame material (wood vs. vinyl vs. aluminum), and about two to three hours.
The parts you'll be working with
- Cassette housing (contains the roller and spring mechanism)
- Top and bottom guide channels or cables
- Side guide channels (on 4-sided systems)
- Bottom hem bar (part of the screen itself)
- Handle and latch assembly
- Mounting brackets and fasteners
- Assembly/tension adjustment tool (usually included or a flathead screwdriver)
The most common DIY failure points are misalignment of the guide channels (causing the mesh to bind or bunch when retracting), using the wrong fasteners for the frame material (screws that strip out of vinyl or that don't anchor into aluminum properly), and incorrect spring tension. On spring tension specifically: Pella's service documentation flags it as a critical step, noting that the exterior side of the guide channel must be placed into the assembly bracket correctly during installation or the tension won't work properly. If the screen doesn't fully retract or feels sluggish, that's usually a tension issue or a channel alignment issue, not a defective screen.
Pay for a professional installation when: your door frame is an unusual material or shape that requires custom fastening, the opening is wider than about 60 inches (larger springs and heavier mesh make alignment more critical), you want an in-jamb mount and your clearances are tight, or you've already made one attempt and ended up with a misaligned screen. Professional installers typically charge $100–$250 for a single screen door installation, and most screen dealers or home improvement stores can refer you to installers. The Home Depot, for example, lists installation services alongside many retractable screen products in-store and online.
Where to buy: Home Depot, Lowe's, Canada, and finding local options
The three most accessible purchase paths are big-box retailers, authorized specialty dealers, and direct-from-manufacturer ordering. Each has real trade-offs.
Home Depot and Lowe's
Both retailers carry retractable screen door options in-store and online, though the in-store selection is typically limited to a handful of standard sizes (usually 32", 36", and 48" widths). What they do well: you can see the product, check the hardware quality in person, and return it easily if it doesn't fit. Home Depot provides installation instruction pages and retractable screen guides under their screen category, which is useful for comparing what's in a standard kit versus what needs professional help. Lowe's similarly offers measuring guides on product pages. When shopping either retailer, check the product listing carefully for whether guide channels and all mounting hardware are included, or if those are sold separately. Also confirm the return window: returning a screen you've partially installed is usually much harder.
Canada-specific buying
Canadian homeowners can find retractable screen products at Home Depot Canada and Lowe's Canada (now operating as RONA in many locations), as well as through Canadian specialty dealers for brands like Phantom Screens, which is headquartered in British Columbia and has an extensive dealer network across Canada. Phantom Screens are sold exclusively through authorized dealers rather than big-box stores, so you'd find them through the brand's dealer locator rather than a retail shelf. Warranties can differ between Canadian and US product lines, so check that when comparing.
Specialty dealers and "near me" searches
Searching "manual retractable patio screen near me" will surface local door and window dealers, patio enclosure companies, and screen specialty shops. These dealers typically carry a wider range of sizes, can custom-order to your exact measurements, and often include professional installation in the quote. SunSetter, for example, sells its EasyScreen exclusively through authorized dealers rather than retail chains. If you're between sizes or have an unusual door configuration, a local dealer is worth the phone call. You'll usually pay more for the product itself but save on frustration and potential returns.
What to check before you buy, anywhere
- Does the listed size match your measured opening, or do you need to trim the tracks?
- Are guide channels, all mounting hardware, and the bottom guide included in the kit?
- What's the mesh type and weight? Is it listed explicitly?
- What's the warranty, and are components covered separately from mesh? (Some brands, like Retractable Screens LLC, offer lifetime coverage on components but only 1 year on mesh for manual systems.)
- Is there a return or exchange policy if the fit doesn't work after install?
- Does the retailer or dealer offer installation service, and what does it cost?
Keeping it working: maintenance, troubleshooting, and common fixes
A manual retractable screen has relatively few moving parts, but the ones it has need occasional attention. Here's what to do proactively and how to fix the most common problems.
Routine maintenance
Clean the mesh and the cassette housing one to two times per season using water, mild detergent, and a soft brush. Phantom Screens explicitly warns against harsh chemicals and pressure washing, both of which can degrade the mesh fibers and damage the cassette finish. For the bottom track, Casper's maintenance guidance recommends vacuuming it monthly to clear out debris, since grit in the track is the primary cause of mesh binding and uneven retraction. Wipe the guide channels with a damp cloth at the same time.
One important lubrication note: don't lubricate the tracks on all systems. SunSetter's EasyScreen owner's manual specifically states that lubrication is not needed and warns against using oil or silicone-based products, which can attract dirt and gum up the mechanism. Check your specific product's manual before applying anything to the tracks. For systems that do allow lubrication, dry PTFE spray (not WD-40 or silicone oil) is the safer option.
Fixing a sagging or slow-to-retract screen
Sag in the mesh usually means either the bottom hem bar has bent or warped, or the spring tension in the roller has weakened. A bent hem bar can often be straightened if it's a minor warp, or replaced if your screen manufacturer sells replacement parts. Weak spring tension is the trickier fix. On many systems, the roller tension is adjustable without replacing the spring. The process generally involves removing the cassette, manually winding the spring roller by a set number of turns, and reinstalling. Pella's service documentation for their Rolscreen, for example, describes this as a critical adjustment where the guide channel must be reseated into the assembly bracket correctly or the tension calibration won't hold. If adjusting tension doesn't help and the screen still won't retract fully, the spring is likely broken and needs replacement.
Fixing mesh tears and punctures
Small tears (under about 1 inch) can be patched with screen repair tape or a patch kit available at any hardware store. Larger tears, or any tear along the edge where the mesh meets the hem bar or cassette, usually mean replacing the mesh entirely. Most cassette systems allow you to replace just the mesh roll rather than the entire unit, though the process requires removing the cassette and respooling the new mesh on the roller. If you're not comfortable with that, a local screen shop can do it for $30–$60 in most areas.
Fixing alignment and binding issues
If the mesh bunches on one side or catches when retracting, the guide channels are out of alignment. Loosen the channel mounting screws slightly, realign the channel so it's plumb and parallel to the cassette, and retighten. Run the screen through a few full cycles to confirm it moves cleanly. If binding happens only at one spot in the travel, look for a dent, debris, or a screw head protruding into the channel at that point. On cable-guided systems, check that the cables are still taut. If a cable has gone slack, the mesh will drift and catch.
Quick troubleshooting reference
| Symptom | Likely cause | Fix |
|---|---|---|
| Screen won't fully retract | Low spring tension or debris in track | Vacuum track, then adjust or replace roller spring |
| Mesh sags in middle | Bent hem bar or weak spring | Straighten or replace hem bar; adjust spring tension |
| Screen binds partway through travel | Misaligned channel, debris, or protruding fastener | Clean track, check fasteners, realign channel |
| Mesh tears at edge | Hem bar attachment failure or stress from heavy use | Patch small tears; replace mesh roll for larger damage |
| Screen snaps back too hard | Overtensioned spring | Reduce roller tension per manufacturer instructions |
| Handle latch won't hold | Worn latch mechanism | Replace latch hardware (usually sold as a spare part) |
The cost of a manual retractable patio screen ranges from roughly $150 for a basic big-box unit you install yourself to $600 or more for a premium system with professional installation. If you want a more exact number for how much retractable patio screens cost in your area, check local installer quotes and the screen size you need how much are retractable screens for patio. The pricing guide for retractable patio screens covers that range in more detail if you're still in the budgeting phase. The main thing to remember: a well-measured, correctly installed, and lightly maintained manual screen will last years without drama. The problems that make people frustrated with these products almost always trace back to a sizing mistake on the front end or a skipped cleaning on the back end.
FAQ
How do I measure for a manual retractable patio screen if my door opening is not perfectly square?
Measure width and height at multiple points (top, middle, and bottom) and use the smallest clear dimension as your order basis. If the frame is visibly out of square, plan for face-mount when possible, because in-jamb installs leave less tolerance for guide-channel alignment.
What if my screen width falls between two sizes, should I buy the larger or the smaller kit?
In most systems, ordering the next size up is safer because guide channels are often trim-adjustable. Only choose the smaller size if the manufacturer states trimming is not supported, since a short cassette can leave gaps at the edges that let bugs through.
Can I install a manual retractable patio screen on vinyl or composite door frames, and what fasteners should I use?
You can, but the fastener choice matters. Avoid self-tapping screws that just bite the surface of vinyl, use the manufacturer’s recommended screw type, length, and spacer or anchor method for your frame material, and pre-drill to reduce cracking or stripping.
What causes a screen that retracts halfway then stops, even though it fully extends?
Most often it is guide-channel misalignment, a bottom track obstruction, or incorrect spring calibration. Check for debris in the bottom track, confirm the channel faces the correct bracket side on installation, then run several full cycles after reseating and retightening.
Do I need to lubricate the tracks on every manual retractable patio screen?
No. Some brands explicitly say lubrication is not required and warn that oil or silicone can attract dirt and gum up the mechanism. If your manual permits lubrication, use dry PTFE spray only, and wipe excess so it does not migrate onto the mesh.
How can I tell whether the problem is mesh damage versus a spring tension issue?
If the screen bunches, sags unevenly, or catches at the same travel point, suspect mesh or guide alignment. If the mesh feels heavy and retracts sluggishly through the full travel, suspect weakened spring tension or a tension calibration that was not set correctly.
What should I do if the handle latch keeps letting go or the screen creeps back?
First confirm the handle is oriented so the lock faces the correct side of the door frame, then inspect the latch for smooth engagement and any bent latch components. If the latch engages properly but still releases early, the cassette may be seated unevenly or the lock strike area may be obstructed.
Can I replace only the mesh instead of the whole cassette if it tears?
Often, yes. Many cassette systems support mesh-only replacement by removing the cassette and respooling the new mesh onto the roller. Confirm compatibility with your exact brand and model, because mesh roll mounting method and roller width do vary by manufacturer.
Is channel-guided or cable-guided better for windy patios?
For exposed, high-wind areas, channel-guided is usually more reliable because it contains the mesh and limits lateral drift. Cable-guided systems can look cleaner and may install more easily, but they allow more side-to-side movement that can increase catch points in strong gusts.
How do I prevent staining or damage from cleaning products on the mesh?
Use mild detergent and water with a soft brush, avoid harsh chemicals, and never pressure wash the mesh or cassette. Rinse thoroughly so residue does not dry into the fibers, which can increase resistance and make retraction feel rough over time.
When should I pay for professional installation instead of DIY?
Choose pro help if the opening is wider than about 60 inches, your frame has unusual dimensions or a complex trim shape, you want an in-jamb mount with tight clearance, or you have already installed once and the screen now binds. The cost can be worth it because correcting alignment and tension after a misfit is often more time-consuming than doing it right the first time.