A professionally installed retractable patio awning in the U.S. typically costs between $1,500 and $3,500, with most homeowners landing around $2,000 to $2,700 once you factor in the unit, hardware, and labor. If you go the DIY route with a big-box consumer model, you can spend as little as $150 to $800 for the product alone, but a custom motorized system with sensors and hard-wired electrical can push past $7,000 to $10,000 for large or premium builds. Where you fall in that range depends on six things: size, fabric quality, frame material, motorization, your mounting surface, and local labor rates.
How Much Does a Retractable Patio Awning Cost: US Prices & Guide
Owen Delaney
12 Jul 2026
What this guide covers and how to use it
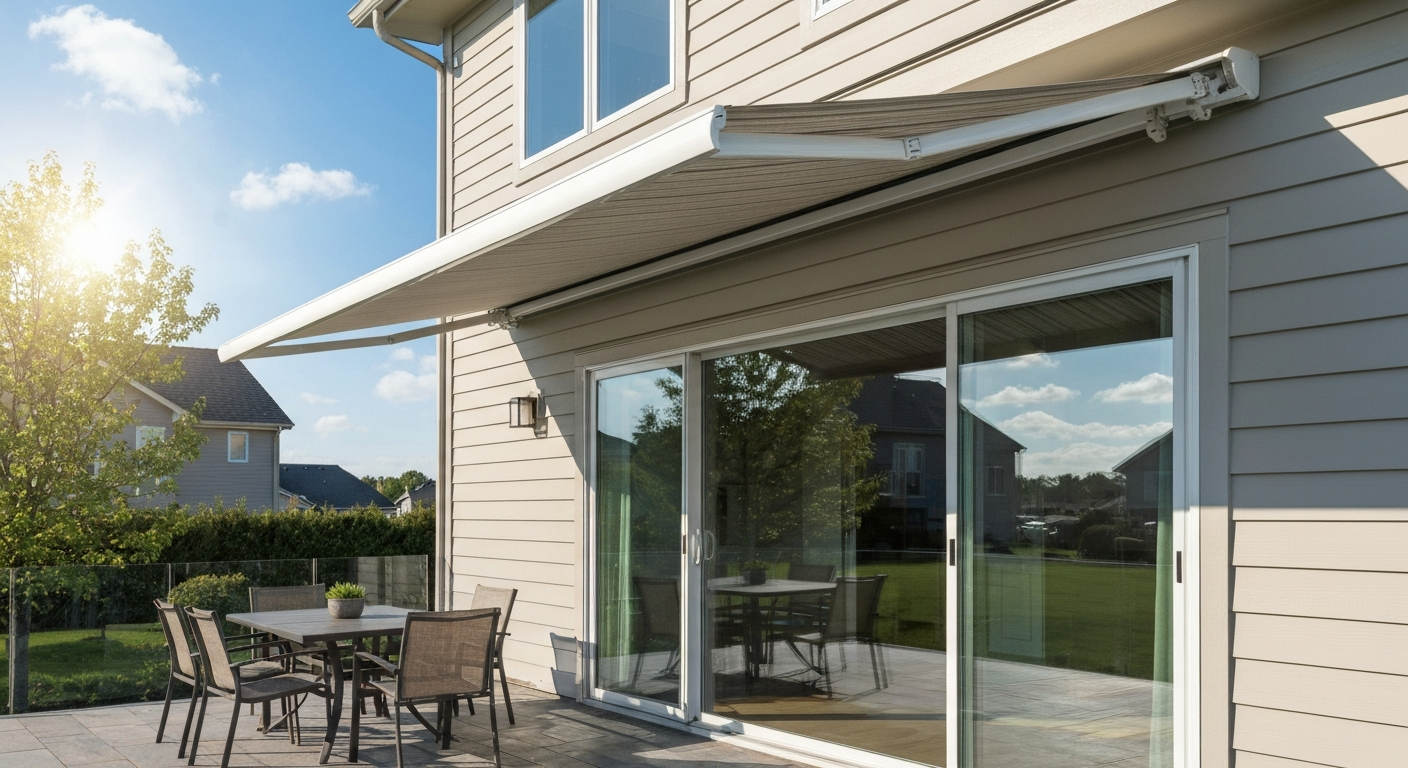
If you found this page while shopping for shade over a sliding door, French door, or bifold patio door, you're in the right place. This guide walks through every cost component so you can build a realistic budget before you call a single dealer. You'll find price ranges broken down by tier (entry, mid, and high-end), a full line-item cost table, sizing rules specific to common patio door widths, a side-by-side look at motorized versus manual options, and a plain-English explanation of when you'll need an electrician or a permit. By the end, you'll know what questions to ask for a quote and whether a retractable awning actually makes sense for your situation, or whether an alternative like a manual louvered patio cover or a retractable screen fits your budget and door type better.
Typical U.S. price ranges: entry, mid, and high-end
The single biggest mistake I see homeowners make is budgeting only for the product and forgetting about installation, electrical, and mounting hardware. Here's how the three tiers break down in real terms.
| Tier | What you get | Product cost (unit only) | Installed total (typical) |
|---|---|---|---|
| Entry | Manual 8–10 ft consumer unit, polyester fabric, basic frame, DIY or simple install | $150–$600 | $1,000–$1,800 |
| Mid-range | Motorized 10–13 ft unit, solution-dyed acrylic fabric, aluminum frame, dealer-installed | $800–$2,500 | $1,800–$4,000 |
| High-end | Motorized 13–20+ ft unit, premium acrylic/Sunbrella fabric, heavy-duty frame, sensors, smart-home integration | $3,000–$7,500+ | $5,000–$10,000+ |
The national average of roughly $2,000 to $2,700 installed reflects the sweet spot: a mid-size motorized unit (around 10 by 12 feet) mounted on a wood-framed house by a two-person installation crew in a few hours. Costs climb fast if you have a masonry or stucco exterior, need new electrical, or want sensors and smart-home integration. Costs drop significantly if you handle installation yourself on a small manual unit.
Size-based installed cost examples
| Awning size | Approximate installed range |
|---|---|
| 8 ft × 10 ft (small) | $1,200–$2,400 |
| 10 ft × 12 ft (medium) | $1,800–$3,600 |
| 12 ft × 20 ft (large) | $3,600–$7,200 |
Complete cost breakdown: every line item explained
When I priced out my own install a few years back, I was surprised how many individual costs added up before anyone touched a drill. Here's every component you should budget for.
| Cost component | Typical range | Notes |
|---|---|---|
| Fabric (awning cover) | $150–$1,200 (as part of unit) | Polyester is cheapest; solution-dyed acrylic (Sunbrella) lasts 8–15+ years. Sunbrella fabric runs ~$25–$40/yard at retail. |
| Frame / cassette | Included in unit price | Aluminum cassette housing protects fabric; heavier-gauge frames cost more but handle wind better. |
| Motorization | $400–$1,500 added to base unit | Battery-assisted motors add ~$400–$600; hard-wired tubular motors (Somfy OEM) add $800–$1,500+. |
| Wind/sun sensors | $45–$220 per sensor | Somfy Soliris station sensors run $150–$220; basic vibration sensors start around $45. |
| Mounting hardware | $20–$300 | Wood substrates: standard lag bolts. Masonry/stucco: Tapcon or Hilti anchors add material cost and labor time. |
| Installation labor | $400–$2,000 | Standard 2–4 hours on single-story wood: $400–$800. Masonry, second-story, or structural reinforcement: $800–$2,000. |
| Electrician / wiring | $150–$600+ | Adding an outdoor outlet or short branch circuit: $150–$400. New circuit or panel work: $400–$600+. |
| Permits and inspections | $50–$300 | Many simple installs don't require a permit, but motorized or structurally significant awnings often do. |
| Accessories | $100–$2,000 | LED valance lighting, side screens, remote handsets, smart-home bridge devices. |
| Fabric replacement (future) | $300–$1,500 | Typical re-cover cost when fabric wears out, usually after 8–15 years depending on material. |
The product itself (fabric plus frame) typically accounts for 50 to 70 percent of your total spend. Motorization and controls are the next biggest variable, and they're where costs can jump unexpectedly if you want a Somfy-based smart system with app or voice control. How Much Does a Retractable Awning Cost? | RiserShade (pricing guide) reports that motorization typically adds about $400–$600 for basic battery-assisted options up to $800–$1,500+ for Somfy OEM tubular motors and smart‑home capable systems (dealer-installed pricing includes the motor, wiring, and programming). Labor and structural work round out the rest, and that line varies more by region and substrate than almost anything else.
What actually drives price the most
Five factors move the needle more than anything else. Understanding them lets you make intentional trade-offs rather than just accepting a quote you don't fully understand.
- Size: Projection depth and width are the two dimensions that set your base price. Going from a 10-foot-wide awning to a 20-foot-wide awning roughly doubles material costs. Projection (how far it extends from the wall) also drives fabric area and wind-load engineering requirements.
- Wind rating: An awning rated for higher wind speeds uses heavier-gauge aluminum arms, stronger pivot hardware, and a more robust cassette. That structural upgrade can add $300 to $800 or more to the unit price, but it's worth it in exposed or coastal locations.
- Motorization: A manual unit with a crank is the cheapest option. A battery-assisted motor adds convenience without wiring. A hard-wired Somfy tubular motor with a wall switch, remote, and sensor integration is the most expensive but also the most reliable for large, heavy awnings.
- Fabric material: Polyester fabrics cost the least and fade faster. Solution-dyed acrylic (Sunbrella being the best-known brand) holds color longer, resists mildew, and lasts 8 to 15-plus years with basic care. The price difference between polyester and premium acrylic is roughly $200 to $600 on a mid-size unit.
- Mounting surface: Wood framing is the simplest and cheapest substrate. Masonry, brick, concrete, or stucco walls require specialized anchor hardware (Tapcon or Hilti-type masonry screws), slower drilling, and sometimes structural assessment, all of which add labor time and cost.
Measuring for your awning and matching it to your patio door
Getting the sizing right is where patio door compatibility really comes into play. The goal is for the awning to cover the full door width plus a few feet on each side for effective shade, and to project far enough out to block direct sun at the times you actually use the space. Failing to measure this correctly is one of the most common (and expensive) mistakes in the whole process.
Standard patio door widths and recommended awning widths
| Patio door type | Common rough opening widths | Recommended minimum awning width |
|---|---|---|
| Single sliding door | 60 in (5 ft) to 72 in (6 ft) | 10–12 ft (add 2 ft each side) |
| Double sliding door | 96 in (8 ft) to 144 in (12 ft) | 12–16 ft |
| French door (double) | 60 in (5 ft) to 72 in (6 ft) | 10–12 ft |
| Bifold / multi-panel door | 96 in (8 ft) to 192 in (16 ft) | 12–20 ft |
Adding roughly 2 feet of awning width beyond each side of the door frame gives meaningful shade overlap and prevents direct sun from angling in from the edges. Projection depth matters too: for a patio door with a dining or seating area, a 10- to 14-foot projection is common. Shorter projections (8 feet or less) work for narrow door stoops but won't cover a full outdoor table setup. Always measure the available wall height above your door opening before ordering, because the mounting bracket needs at least 10 to 12 inches of clear wall space above the door frame, and some doors with transoms or decorative headers have less room than you'd expect.
Bifold patio doors deserve special attention here. Because they swing and stack outward when open, you need to confirm the awning projection clears the door panels at full open. Most bifold manufacturers publish the panel stack depth (typically 8 to 16 inches per panel), and your awning should project enough that it doesn't interfere with the door swing arc. This is a detail worth confirming with both your door manufacturer's specs and your awning dealer before you order.
Mounting options and structural requirements
How and where an awning mounts affects both the installation cost and the long-term structural integrity of the install. There are three common mounting configurations for patio door applications, and each has different requirements.
- Wall mount (most common): The awning header bracket fastens directly to the exterior wall above the door. On wood-framed walls, installers use lag bolts (typically 3/8 inch by 3 to 4 inches) driven into studs or a continuous header. On masonry, brick, or concrete, Tapcon or Hilti-style masonry anchors are required, which means a hammer drill and slower drilling. Masonry mounts add at least 1 to 2 hours of labor.
- Fascia mount: The bracket attaches to the fascia board under the roofline. This works well on single-story homes and keeps the awning tight to the structure. The fascia board must be structurally sound and at least 1.5 inches thick. Rotted or undersized fascia requires replacement before mounting, which adds cost.
- Soffit or rafter mount: Used when there's no suitable wall or fascia surface. Requires blocking or structural backing added inside the soffit cavity. This is the most complex mounting scenario and typically the most expensive because it may require a carpenter or structural assessment.
Regardless of mount type, the installation manual for most major brands (SunSetter being a widely referenced example) specifies fastener sizes and anchor patterns for both wood and masonry. Following those specs matters for warranty compliance and for safety. An awning on a 12-foot projection carries substantial load in wind, and a poorly anchored bracket can pull free. If your installer doesn't discuss the substrate and anchor type before drilling, that's a red flag worth pushing back on.
Motorized vs manual retractable awnings: the real trade-offs
Manual awnings use a hand crank to extend and retract the arms. They're simpler, cheaper, and have no electrical requirements, but they're also less convenient for large or heavy units, and they rely on you to retract before a storm. Motorized awnings use a tubular motor inside the roller tube to extend and retract at the push of a button. The convenience gap between a crank and a remote is real, especially for awnings wider than 12 feet or for anyone with mobility concerns.
| Feature | Manual (crank) | Battery-assisted motor | Hard-wired motor (Somfy/OEM) |
|---|---|---|---|
| Upfront cost delta | Baseline | +$400–$600 | +$800–$1,500+ |
| Electrical work required | None | None (rechargeable battery pack) | Yes (outdoor outlet or new circuit) |
| Ease of use | Requires manual effort | Remote/button operation | Remote, wall switch, app, or voice |
| Automation / sensors | Not available | Basic remote only | Wind sensors, sun sensors, smart-home |
| Reliability for large units | Adequate up to ~12 ft wide | Good up to ~14 ft wide | Best for 14 ft+ or heavy fabric |
| Somfy motor warranty example | N/A | Varies by brand | ~5 years (Somfy tubular motor) |
Wind and sun sensors are worth a serious conversation if you're going motorized. A Somfy Soliris station sensor (a combined sun and wind sensor) runs roughly $150 to $220 and automatically retracts the awning when wind speed exceeds a set threshold or when sun drops below a certain angle. Basic vibration-based wind sensors start around $45. These sensors aren't just a luxury: insurance adjusters and manufacturer warranties often draw a distinction between storm damage on an unprotected awning versus one that had automatic wind protection. If you're spending $3,000 or more on a system, spending another $150 to $200 on a sensor is straightforward insurance.
Smart-home integration (control via Alexa, Google Home, or Apple HomeKit through a Somfy TaHoma or similar bridge device) typically adds another $100 to $300 for the bridge hardware plus programming time. It's a convenience feature rather than a necessity, but worth budgeting if you're already building out a smart-home setup.
Electrical work, permits, and local code: what to expect
This is the section most dealers gloss over in their quotes, and it's where unexpected costs appear. A hard-wired motorized awning needs a power source. If you already have an outdoor GFCI outlet within reach, installation is straightforward. If not, you'll need a licensed electrician to add one.
Electrical costs
Licensed electricians in the U.S. typically charge $50 to $130 per hour. Adding a single outdoor GFCI outlet or running a short branch circuit to the awning location commonly costs $150 to $400 in total. If the nearest panel is far away, or if you need a new circuit breaker added, costs can reach $400 to $600 or more. Get an electrician quote separately from your awning quote, because most awning installers are not licensed electricians and will subcontract or leave it to you.
Permits: when you need one
Many jurisdictions don't require a permit for a small, wall-mounted residential awning, but that's not universal. You're more likely to need a permit when the awning is motorized, when it attaches to a regulated structure, when it extends over a sidewalk or public right-of-way, or when electrical work is involved. New York City, for example, explicitly requires a DOB permit filing for awnings that extend over the sidewalk or are attached to buildings in regulated ways, and NYC is not alone in that approach. Permit fees nationally run about $50 to $300 for awning-related filings.
The practical advice here is to call your local building department before you order, not after. A quick five-minute call (or a look at the municipality's online permit lookup tool) tells you whether you need a permit and roughly what it costs. Finding out after installation that you needed a permit is a headache that can mean retroactive inspections, fines, or having to modify the install. Your awning dealer should know the local requirements, but verify it yourself because they're not the ones who get the fine.
Timeline impact of permits and electrical
If your project requires a permit and a separate electrical sub, budget for a longer timeline. Permit approvals can take anywhere from a few days in small municipalities to several weeks in larger cities. Scheduling a licensed electrician after awning installation (or coordinating them to run conduit before the awning goes up) adds coordination time. For a simple manual awning on a wood wall with an existing outlet, you can go from order to install in two to four weeks. For a permitted, hard-wired motorized system in a complex jurisdiction, six to ten weeks is more realistic.
Retractable awnings vs other shade options for patio doors
A retractable awning is not always the right tool. Before committing, it helps to compare it honestly against the alternatives that serve patio door shade.
| Option | Typical installed cost | Retractable | Works with all door types | Best for |
|---|---|---|---|---|
| Retractable patio awning | $1,500–$7,000+ | Yes | Yes | Open patios, sun control, flexible coverage |
| Manual louvered patio cover | $2,500–$8,000+ | Partially (louvers adjust) | Yes | Permanent shade, rain protection, aesthetic upgrade |
| Fixed pergola/shade structure | $1,500–$10,000+ | No | Yes | Permanent shade, low maintenance |
| Retractable screen (door/patio) | $200–$1,500 | Yes | Mostly (check door clearance) | Bug protection, partial sun filtering |
| Exterior shade sail | $150–$800 DIY | No (seasonal removal) | Yes | Budget shade, temporary installs |
If you want permanent weather protection and a more architectural look, a manual louvered patio cover can be a strong alternative that also works well over most patio door types. Retractable screens are a much lower-cost option if your main concern is insects and partial sun rather than full shade, and they integrate cleanly with sliding or French patio doors. For local service and repairs, consider searching for patio screen repair Lake Worth to find specialists who can install or fix retractable screens. If you're also considering screens, see our guide on whether patio screen doors are universal for help matching screens to different door types are patio screen doors universal. The right choice often comes down to how much shade you need, whether you want the option to open the space fully on overcast days (where a retractable awning wins), and your budget ceiling. For more options and comparisons, see patio screen door alternatives for solutions that focus on insect protection, light control, and integration with sliding or French doors.
Long-term costs: lifespan, maintenance, and warranties
A well-made retractable awning with quality acrylic fabric and an aluminum frame should last 10 to 15 years or more before needing major work. The fabric typically wears out first. Fabric re-covers for a mid-size awning cost $300 to $1,500, with premium Sunbrella re-covers toward the top of that range. Sunbrella premium awning fabric (solution‑dyed acrylic) commonly retails around $25–$40 per yard, example listing: Sunbrella 4634 White Marine awning fabric priced per yard at a retail distributor Sunbrella 4634 White Marine Awning and Shade Fabric | HouseFabric (price per yard). Motors generally outlast the fabric if they're properly maintained, but a Somfy tubular motor replacement (labor plus part) can run $300 to $600 if it fails outside of warranty. Somfy's warranty on tubular motors is typically five years.
Annual maintenance costs are modest: fabric cleaning with a soft brush and mild soap a couple of times a year, lubricating the arms and pivot points once a year, and retracting the awning before any storm. If you have sensors, test them seasonally to make sure they're triggering correctly. Ignoring maintenance is the fastest way to shorten fabric life or end up with a motor failure in year six instead of year twelve.
DIY vs professional installation: honest trade-offs
Small manual awnings (up to about 10 feet wide, 100 to 150 pounds) are genuinely DIY-friendly if you're comfortable on a ladder and confident finding studs or drilling into masonry. Home Depot and similar retailers sell manual consumer units with installation instructions, and the process is straightforward on a wood-framed single-story wall. Expect 3 to 5 hours for a first-time installer.
Motorized awnings wider than 12 feet, any masonry or stucco mount, and anything requiring electrical work should be professionally installed. The units are heavy (some 20-foot motorized awnings weigh 200 to 300 pounds), the bracket placement has to be precise, and a bad mount on a large awning is a safety issue, not just a cosmetic one. The installer warranty (typically 1 year on labor) also protects you from callbacks if something isn't right.
Buyer's checklist: what to gather before getting quotes
Having this information ready before you contact dealers saves time and gets you more accurate quotes faster.
- Measure your door width (rough opening) and the available wall height above the door frame.
- Identify your exterior wall material (wood framing, brick, masonry, stucco, EIFS/foam) — photo is helpful.
- Decide on manual vs motorized and your preferred control method (remote, wall switch, smart-home).
- Note whether you have an existing outdoor GFCI outlet within 6 to 10 feet of the install location.
- Determine how much projection you need (measure from the wall to where you want shade to reach).
- Check your local building department's website or call to ask whether a permit is required for a wall-mounted awning of your planned size.
- Get at least three quotes: one from a local awning dealer, one from a national brand dealer (SunSetter, Sunsetter XL, etc.), and one from a general home improvement contractor if you want a competitive labor comparison.
- Ask each dealer: what fabric warranty do you offer, what happens if the motor fails in year four, and is electrical work included or subcontracted?
FAQ
How much does a retractable patio awning cost installed (entry, mid, high-end) for U.S. homeowners?
Installed price ranges you'll commonly see for U.S. homes: Entry-level: $1,000–$2,000 (small manual or basic motorized units, simpler mounts). Mid-range: $2,000–$4,000 (larger sizes, better fabric like Sunbrella, reliable motors such as Somfy, standard installation). High-end: $4,000–$8,000+ (large custom sizes, premium fabrics, heavy-duty frames, full hard‑wired motors, smart controls, lighting, and complex mounts). DIY retail/product‑only prices are much lower (small manual consumer units $150–$450; consumer motorized models $400–$800) but don’t include professional labor or electrical work.
What drives those price ranges (complete cost breakdown)?
Major cost components and typical contribution: Product (fabric + frame): 50–70% of total. Fabric grade: $300–$1,500+ for a re-cover; premium solution‑dyed acrylic (Sunbrella) costs more but lasts longer. Frame & hardware: included with product, varies by series. Motorization & controls: $400–$1,500+ depending on battery vs hard‑wired and smart features (Somfy and similar OEMs at the higher end). Sensors (wind/sun): $45–$220 recommended for motorized units. Mounting hardware & anchors (wood vs masonry): tens to a few hundred dollars. Electrical/wiring/electrician: $150–$400 for a short run/outlet; $500+ if a new circuit or significant conduit work required. Labor/installation: $400–$2,000 depending on access, substrate, and crew time (typical installs 2–4 hours; complex mounts a full day). Permits/inspections: $0–$300 depending on local rules. Accessories (valance, LED lights, side screens): $100–$2,000.
Can you give quick installed price examples by typical size?
Representative installed examples to estimate a budget: Small (8×10 or similar): ~$1,200–$2,400 installed. Medium (10×12): ~$1,800–$3,600 installed. Large (12×20): ~$3,600–$7,200 installed. These are aggregate ranges—motorization, fabric grade, mount complexity, and local labor rates shift the estimate.
How do I size a retractable awning for patio doors (sliding, French, bifold)?
Measure the door opening width and the usable wall/soffit where the awning will mount. Typical guidance: width: choose an awning equal to or wider than the door opening so shading covers door and the immediate patio area (common practice is 6–12 inches wider per side when possible). Projection (how far it extends): pick a projection that blocks sun at the time of day you need shade—common projections are 8', 10', 12', 14'. For sliding doors allow full clearance for door operation and any trim; for French doors or bifold doors confirm the awning’s re‑traction clears door hardware and swing path. If mounting above a transom or on a second story, check required installation height and access; for bifold doors confirm the fold direction won’t be impeded by the awning valance or frame.
What mounting options and compatibility issues should I check for patio doors?
Mounting substrate: wood ledger (easiest), stucco over wood, concrete or brick (requires masonry anchors), or metal studs may need special anchors or blocking. Check for soffit/overhang clearance and ensure awning has proper height so doors open fully. Confirm the location of electrical for motorized units. Verify local code regarding projections and proximity to property lines or sidewalks. If your mounting wall is stucco over masonry or a thin veneer, you may need structural blocking behind the finish—factor this into installation complexity and cost.
Should I do DIY or hire a professional installer? Tradeoffs?
DIY pros: lower cost (product-only pricing), control over schedule, feasible for small manual units and experienced DIYers with proper tools. DIY cons: potential for incorrect fastening, poor wind protection, voided warranties, safety risks on ladders, and no electrical work for hard‑wired motors. Professional pros: correct structural attachment, warranty-backed install, safe motor wiring and sensor integration, faster for larger/complex projects. Professional cons: higher upfront cost. Recommendation: hire a pro for masonry or second‑story mounts, large awnings, hard‑wired motors, or if local codes/HOA require licensed contractor work.