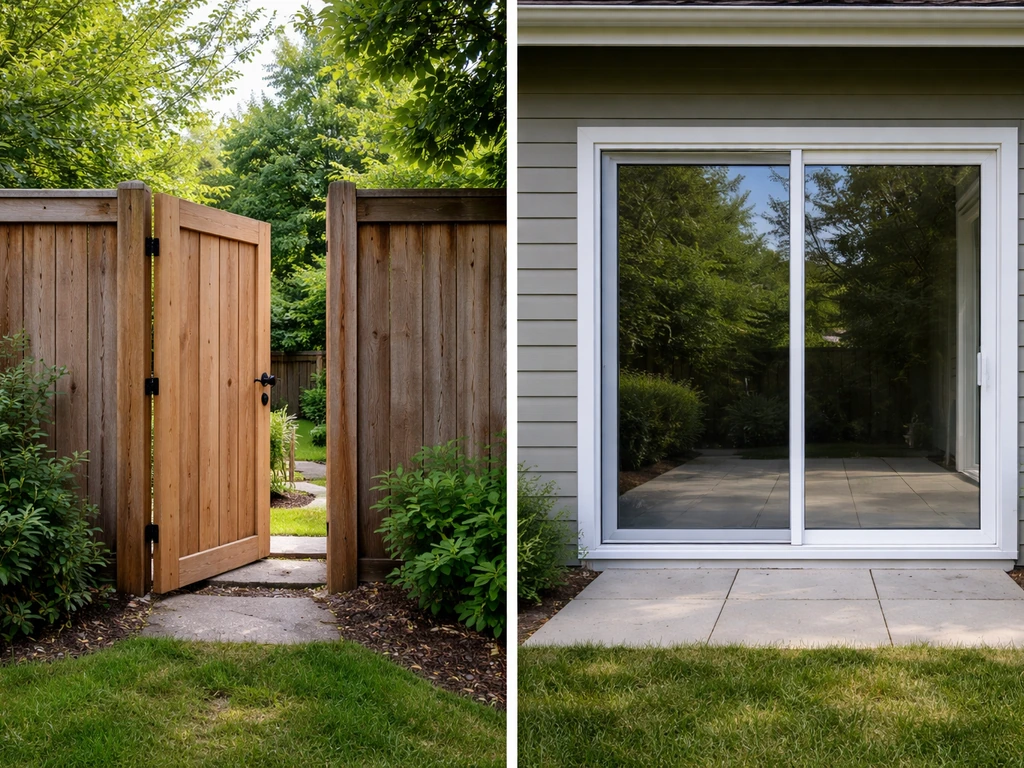
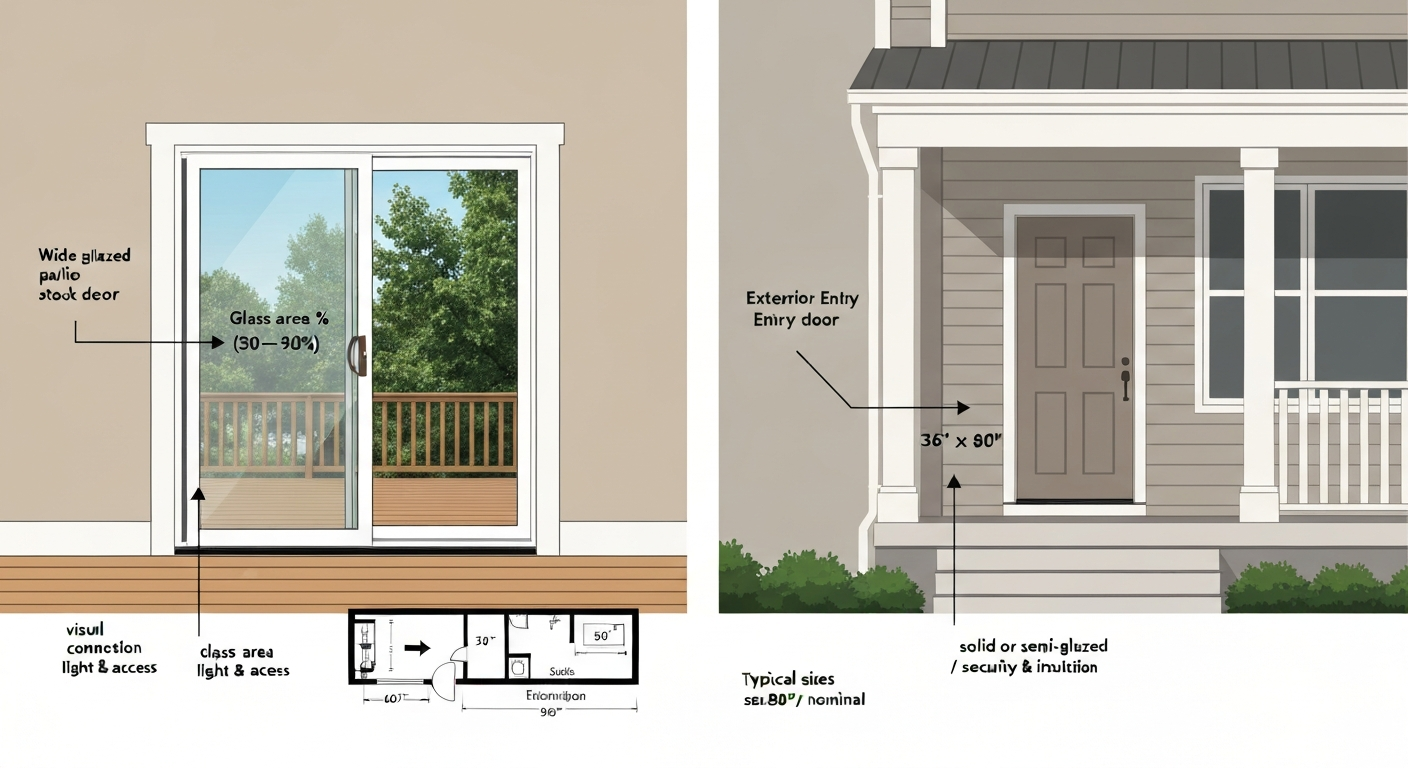
A patio door and an exterior door are not the same thing, even though both sit in an exterior wall. A patio door is primarily a glazed, wide-panel door designed to connect interior living space to an outdoor area like a deck or patio, with sliding, French, bifold, or multi-slide configurations. An exterior or entry door is typically a solid or semi-glazed single slab, 36 in × 80 in being the U.S. standard, meant to serve as a primary entrance. Choosing between them comes down to three things: how much light and access you want, what your wall opening can structurally handle, and what your local code requires for egress and energy performance.
Patio Door vs Exterior Door: Choose the Right Door for Home

Owen Delaney
16 Jul 2026
What each door type actually does
The confusion between these terms is real, and I run into it constantly when homeowners describe a renovation project. So let's get precise before anything else.
A patio door is a wide, heavily glazed door unit, usually 60 in to 96 in wide and 80 in tall as stock sizes, installed at a back wall or side wall where you want interior-to-exterior flow. It's not built to be a primary entry point for guests or deliveries, though it can serve as one. Its main job is to visually open up a room, bring in daylight, and provide easy passage to a patio, deck, or garden. Sliding glass doors, French doors that open onto a patio, bifold doors, and pocket doors all fall under this umbrella.
An exterior door (or entry door) is the standard opaque or lightly glazed hinged slab you think of at a front or back entrance. The most common U.S. nominal size is 36 in × 80 in prehung, though 32 in × 80 in and 30 in × 80 in units are also used. The IRC (R311.2) requires at least one side-hinged egress door per dwelling with a minimum 32 in clear width (measured with the door at 90 degrees open) and 78 in clear height measured from the top of the threshold to the bottom of the stop. Entry doors are optimized for security, weather resistance, and structural insulation rather than light transmission.
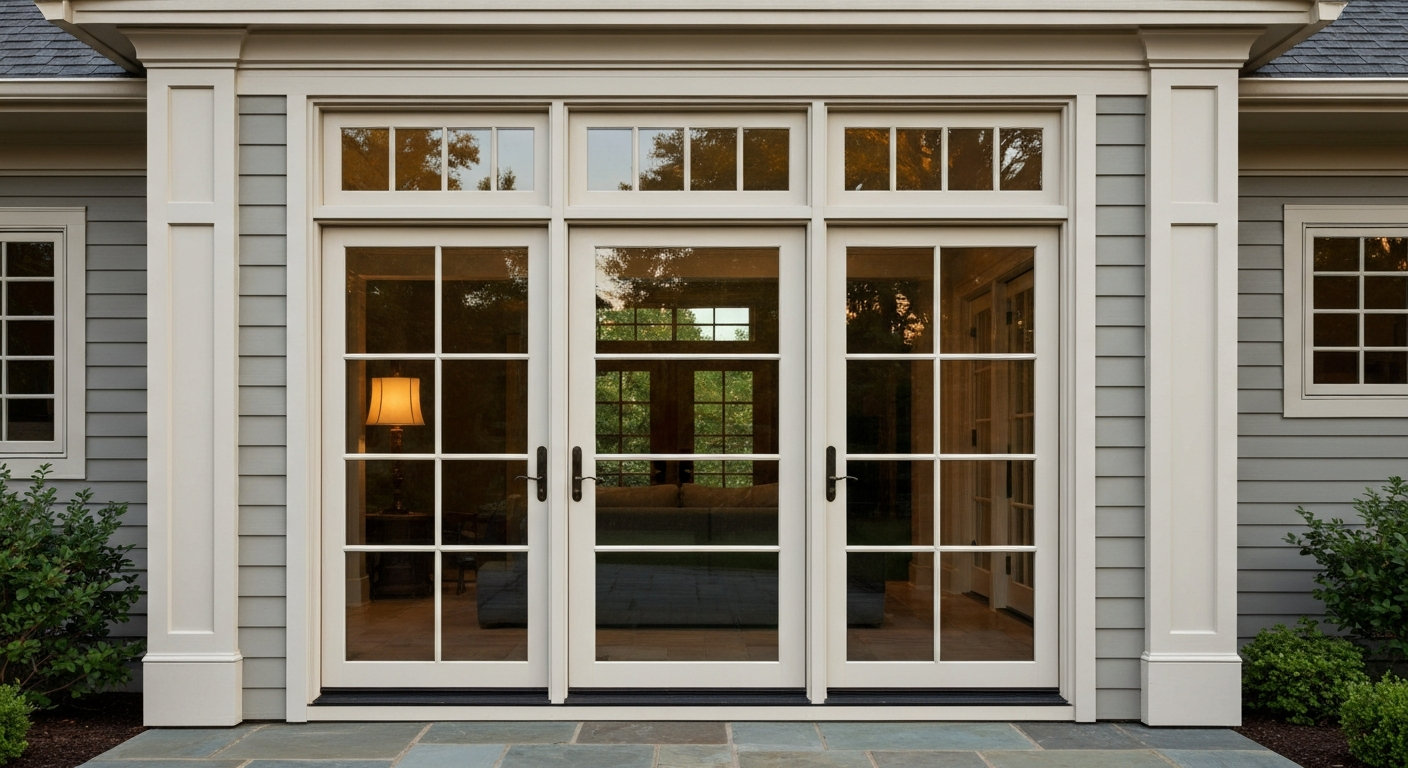
A garden door or back door sits in a middle ground. In common usage, a garden door is a hinged, often fully glazed or French-style door that opens directly to a garden or rear yard. It looks like a patio door but functions more like an entry door. If you've seen the sibling topic on garden door vs. patio door, the distinction there goes deeper, but for this comparison the key point is that garden/back doors share sizing and threshold rules with exterior doors more than with wide sliding patio door systems. See the related article on garden door vs. patio door for a deeper comparison of those two closely related options.
Patio door or exterior door: which one do you actually need?
Here's how I'd frame the decision for most homeowners. If your goal is to flood a living room or dining area with natural light and create a seamless connection to a deck or patio, a patio door wins every time. If your goal is a secure, weathertight passage point that happens to be at the rear of the house, an exterior door is the right call. Most homes benefit from both: a solid exterior/entry door at the front or a side entry, and a patio door at the rear.
Choose a patio door when you have at least 60 in of wall width to work with, you want maximum glass area and light, you're connecting to a deck, patio, or garden where foot traffic is frequent, and you want an open-plan visual connection between inside and outside. Sliding glass doors and bifold systems are particularly strong here.
Choose an exterior/entry door when the opening is 36 in wide or narrower, security is the top priority, the door faces a public-facing or street-side location, or you need a solid insulated core for a very cold or very hot climate. Steel and fiberglass entry doors consistently outperform glass-heavy patio doors in thermal insulation (lower U-factor) when comparing comparable widths.
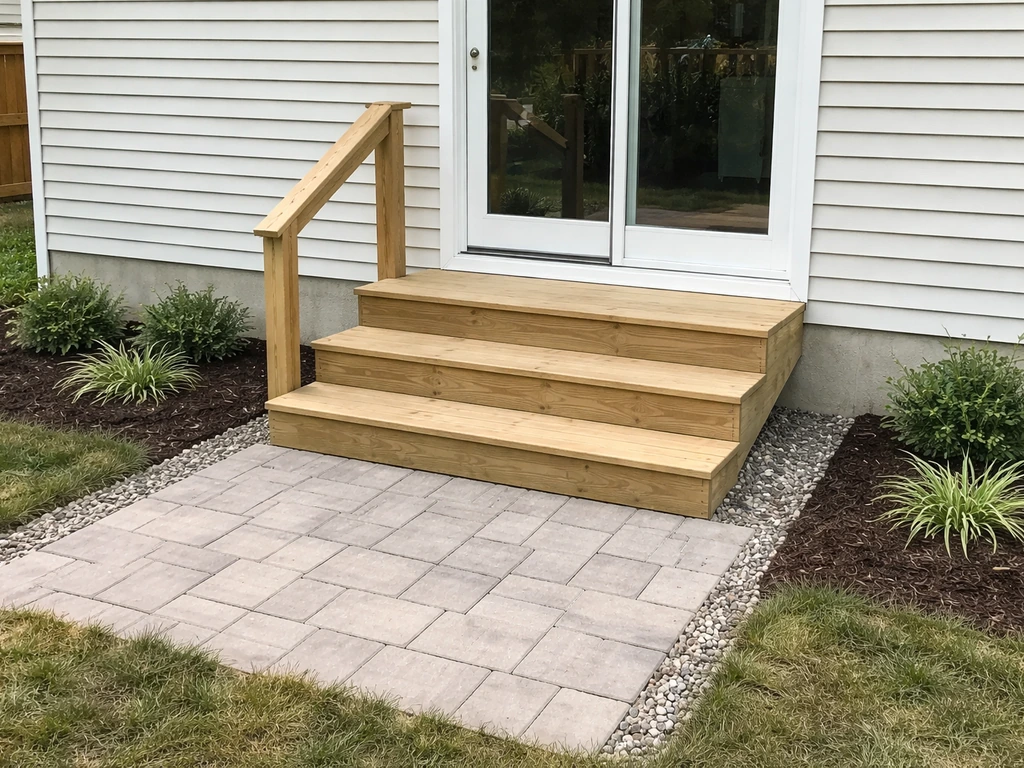
There are a few scenarios where the line blurs. If you have back door steps dropping down to a patio and you want something that reads as an entry point but still provides light, a French-style hinged patio door (sometimes called a garden door) is often the best compromise. The step-down from the threshold to the patio surface is a structural and code issue covered in detail later in this article.
Patio door styles and how they change the function
Once you've decided a patio door is right for your space, the style you pick has real consequences for clearance, structural load, and daily usability. These aren't just aesthetic choices.
Sliding patio doors
Sliding glass doors are the most common patio door in U.S. homes. Standard two-panel units come in 60 in, 72 in, and 96 in wide by 80 in tall as typical stock sizes; 96 in tall units are available but less common. One panel is fixed, one slides. The clear opening is roughly half the total unit width, so a 60 in unit gives you about 28 to 30 in of actual passage, which is tight. A 96 in wide unit gets you closer to 44 to 46 in of clear opening. Sliding doors require no swing clearance inside or out, which is a real advantage in tight spaces, but the track needs regular cleaning to operate smoothly.
French/hinged patio doors
French patio doors are two hinged panels that swing open, either inward or outward. When both panels are open you get near full-width passage, which is excellent for moving furniture or entertaining. A 72 in French door unit, for example, gives you roughly 68 to 70 in of clear passage. The trade-off is swing clearance: an inswing door needs about 36 in of interior clearance, an outswing needs the same on the exterior. You also need to make sure an outswing doesn't swing over a landing or step, which ties directly into IRC R311.3 (more on that in the threshold section). French doors are also slightly more complex to seal against air and water infiltration than a single-panel slider.
Bifold doors
Bifold systems (brands like LaCantina and NanaWall are common in the U.S. market) fold panel-by-panel to one or both sides of the opening, giving you very close to the full wall width as clear opening. They're the most dramatic option for indoor-outdoor living but also the most expensive and structurally demanding. A wide bifold opening requires an engineered header, a structural engineer review per IRC Table R602.7 and its prescriptive limits, and a generous budget. Bifold doors also require the most maintenance of all styles, with multiple hinges, tracks, and seals to manage.
Pocket/multi-slide doors
Pocket and multi-slide systems slide panels into a wall cavity or stack them to one side. They look clean when open because the glass disappears, but they require significant wall thickness for pocketing and, again, engineered headers for wide spans. These are more common in new construction or whole-wall renovation projects than in straightforward replacements.
Materials: what vinyl, fiberglass, aluminum, and wood actually deliver
Material choice affects your long-term maintenance commitment, energy performance, and installed cost more than almost any other variable. I've worked with all four in renovation contexts, and the right answer depends heavily on your climate and budget.
| Material | Typical Lifespan | Maintenance Level | Energy Performance | Relative Cost | Best For |
|---|---|---|---|---|---|
| Vinyl (PVC) | 20–30 years | Very low — no painting | Good (thermally broken frames common) | Lowest | Budget-conscious replacements, humid climates |
| Fiberglass | 20–50+ years if properly installed | Low — paint every 10–15 yrs | Excellent (low conductivity frame) | Mid to high | Cold climates, longevity-focused buyers |
| Aluminum | 25–35 years | Low — anodized/painted | Poor without thermal break; good with it | Mid | Modern aesthetics, coastal/mild climates |
| Wood | 15–30 years with maintenance | High — annual finishing needed | Good (natural insulator) but degrades if neglected | High | Traditional style, interior-facing applications |
| Wood-clad (aluminum or fiberglass exterior) | 25–40+ years | Low exterior, moderate interior | Very good | Highest | Premium installs, mixed-climate regions |
Fiberglass is widely cited as the best all-around material for exterior door applications, with service life quoted at 20 to 50-plus years when installed properly. Steel entry doors cost less upfront and offer strong security, but they can dent and are prone to corrosion at the edges if the finish is breached. For patio doors specifically, vinyl frames dominate the replacement market because of their price point and zero-paint maintenance. In cold climates like the upper Midwest or New England, I'd push homeowners toward fiberglass or thermally broken aluminum over bare vinyl for any unit over 72 in wide, simply because thermal expansion and contraction over decades is harder on vinyl in extreme temperature swings.
Energy performance is governed by U-factor and Solar Heat Gain Coefficient (SHGC), standardized through NFRC 100 ratings. Glazed doors with 25% or more glass area are treated as fenestration under most state energy codes, meaning they must meet the same U-factor and SHGC requirements as windows. Always look for the NFRC label when comparing units. ENERGY STAR-certified patio doors are a safe minimum bar. Air leakage is tested to ASTM E283/NFRC 400 standards; ENERGY STAR-referenced limits for swinging doors are approximately 0.5 cfm per square foot or less.
Patio door vs exterior door: side-by-side comparison
| Feature | Patio Door | Exterior/Entry Door |
|---|---|---|
| Typical width (nominal) | 60 in, 72 in, 96 in (two-panel stock) | 30 in, 32 in, 36 in (most common: 36 in) |
| Typical height (nominal) | 80 in or 96 in | 80 in (6'8") most common; 84 in and 96 in available |
| Glass area | Large (50–90% of unit area) | Low to moderate (0–40% typical) |
| Threshold height | Low-profile; ADA max 1/2 in (beveled) for accessible routes | Typically 3/4 in to 1 in; same ADA rules apply |
| Security rating | Moderate (multi-point locks available; glass is a vulnerability) | High (solid core, deadbolt-ready, hinge-side security) |
| Insulation (U-factor) | Higher U-factor due to glass (less insulating) | Lower U-factor typical for solid/insulated core units |
| Egress compliance (IRC R311.2) | Can comply with 32 in+ clear width opening | Standard egress door — designed for compliance |
| Structural header demand | Wide spans often require engineered headers | 36 in opening: standard prescriptive header per IRC |
| Typical use | Back/garden access, deck/patio connection, light & view | Front/back entry, primary access, security-first applications |
| Typical installed cost | $1,000–$5,000+ (unit + installation) | $500–$3,000+ (unit + installation) |
| Screen options | Full-width retractable or panel screens common | Storm door or individual screen door |
Sizing standards and how to measure correctly
Getting measurements wrong is the most expensive mistake in any door replacement or new install. I've seen homeowners order a 72 in unit for a rough opening that was actually 70 in, and the resulting shimming and structural patching cost more than the door itself. Measure twice, order once.
Understanding rough opening vs. finished opening
The rough opening (RO) is the framed hole in your wall before any framing trim, jamb extensions, or casing are applied. The door frame (or door unit) fits inside the RO. The finished opening is the clear passage you walk through after the door is installed. Per Building America/PNNL guidance, the standard practice is to frame the RO 1.5 in to 2.0 in larger in both width and height than the door frame. This gives you room to shim, square, and insulate around the unit. A 60 in wide patio door unit needs an RO of approximately 61.5 in to 62 in wide. Always verify with the specific manufacturer's installation manual, because tolerances vary by brand.
Step-by-step measuring checklist for replacement and new installs
- Measure the rough opening width at three points: top, middle, and bottom. Use the smallest measurement as your working width.
- Measure the rough opening height at three points: left, center, and right. Use the smallest measurement as your working height.
- For a replacement, measure the existing door frame (not the door slab) to determine the prehung unit size currently in the opening.
- Check the diagonal measurements corner to corner. If they differ by more than 1/4 in the opening is out of square and will need correction before installation.
- Measure sill depth (front to back of the rough sill) to confirm the door frame will seat flush with both interior and exterior wall surfaces.
- Confirm headroom: measure from the subfloor to the bottom of the header. Standard 80 in door + threshold height + sill pan assembly must clear this dimension.
- Note the wall thickness (typically 4.5 in for 2×4 framing or 6.5 in for 2×6 framing). Jamb extension depth on the door unit must match.
- If widening an existing opening, determine whether the wall is load-bearing before proceeding. Load-bearing walls require an engineered header per IRC R602.7.
- For multi-panel patio doors over 72 in wide, get an engineer to confirm header span capacity before ordering.
- Confirm the finished floor material and thickness on both sides of the door (tile vs. hardwood vs. concrete) since this affects threshold height calculations.
Thresholds, step-downs, and getting the transition right
This is the section most homeowners skip, and it's where water damage and code violations happen. The relationship between your door threshold and your patio surface is a structural, drainage, and accessibility question all at once. If you're dealing with back door steps down to a patio, or you need to figure out exactly how far below the door the patio surface should sit, this section is for you.
The IRC step-down rule explained simply
IRC R311.3 allows the exterior landing or finished patio surface to be up to 7.75 in (196 mm) below the top of the threshold, provided the door does not swing outward over that landing. This is the most commonly applied exception in residential construction. In plain terms: if your patio is lower than your threshold by up to 7. For more detail and examples about allowable step-down distances, see how far below door should patio be. 75 in, that's acceptable under code as long as you're not swinging an outswing door directly over the step-down. If the door does swing outward, you need a level landing at threshold height before the step down begins. For inswing doors, the 7.75 in drop is workable without a landing. For more on measuring and building those garden steps safely, see the related guidance on garden steps from patio doors and how far below the door a patio should be.
ADA and accessibility thresholds
If your project involves an accessible route (required for commercial projects and recommended for aging-in-place residential remodels), the 2010 ADA Standards and ICC A117.1 limit thresholds to a maximum of 1/2 in (13 mm), and that 1/2 in must be beveled. For existing or altered thresholds, up to 3/4 in (19 mm) is allowed if beveled at a 1:2 slope. Any threshold taller than 1/2 in on an accessible route must be beveled. This affects both patio doors and exterior doors equally. Residential projects aren't required to meet ADA unless they involve federally funded housing, but following these standards is good practice for visitability and resale value.
Drainage, flashing, and sill pan requirements
blank" rel="noopener noreferrer">ASTM E2112 is the industry's governing standard for fenestration installation, and it's explicit: you need a continuous sill pan flashing with end dams, properly integrated with the water-resistive barrier (WRB), sloped to drain to the exterior. JELD-WEN, like most major manufacturers, requires a sill pan per blank" rel="noopener noreferrer">ASTM E2112 and states outright in their installation manuals that warranty coverage is denied if the sill and pan flashing aren't properly installed. The sill pan keeps water from pooling under the door frame, which is the primary cause of premature rot and air leakage in sliding door systems. When your patio is lower than the threshold, the sill pan drainage needs to exit above the patio surface to prevent water from wicking back. Keep at least 2 in of clearance between the bottom of the door frame and the patio surface for drainage and ventilation.
Landing and ramping options
If you have more than 7.75 in of drop from threshold to patio, code requires either intermediate steps or a ramp. A ramp on an accessible route must slope no more than 1:12 (one inch of rise per 12 inches of run) per ADA standards. For residential step-down construction, treads should be a minimum of 11 in deep and risers a maximum of 7.75 in high per IRC R311.7.5. If you're pouring a concrete patio landing adjacent to a door, slope the patio surface away from the house at a minimum 1/8 in per foot (2% grade) to direct water away from the threshold. Any patio material that traps moisture against the door frame (like mulch or improperly graded pavers) will eventually cause water intrusion.
Security, weatherproofing, and energy performance
Patio doors have historically been seen as a security weak point, and that reputation is partly earned. Single-point latches on older sliding doors can be lifted out of the track. Modern multi-point locking systems (available from Pella, Andersen, Marvin, and most mid-to-upper-tier brands) address this significantly, engaging the door frame at multiple points along the height of the panel. You can also add a secondary bar lock (a cut-down wooden dowel or metal bar in the track) as a low-cost backup for sliding doors. French patio doors benefit from three-point or multi-point locks with a flush bolt at the top and bottom of the inactive panel.
For energy performance, glazed patio doors will always have a higher U-factor (less insulating) than a solid-core exterior door of the same width, simply because glass conducts heat more readily than insulated foam or wood. A solid fiberglass entry door can achieve U-factors of 0.17 or lower. A typical sliding glass door ranges from U-0.25 to U-0.35 for good-quality double-pane units with low-E coatings. Triple-pane patio doors can reach U-0.20 to U-0.22 but at substantially higher cost. SHGC matters too: in hot southern climates, you want a low SHGC (0.25 or below) to minimize solar heat gain; in cold northern climates, a higher SHGC on south-facing patio doors can actually help with passive solar heating.
Cost ranges and what to budget for
Installed costs vary significantly by material, size, brand, and whether you're doing a same-size replacement or changing the rough opening. Here's a realistic range based on current 2025-2026 market data.
| Door Type / Configuration | Unit Cost (DIY supply) | Professional Installation Add-On | Total Installed Range |
|---|---|---|---|
| Vinyl sliding patio door, 60 in × 80 in (entry-level) | $400–$900 | $300–$700 | $700–$1,600 |
| Vinyl sliding patio door, 72 in × 80 in (mid-range) | $700–$1,400 | $400–$800 | $1,100–$2,200 |
| Fiberglass French patio door, 60 in × 80 in | $1,200–$2,500 | $500–$1,000 | $1,700–$3,500 |
| Aluminum multi-slide/bifold, 96 in+ (premium) | $3,000–$10,000+ | $1,500–$4,000+ | $4,500–$14,000+ |
| Standard fiberglass exterior/entry door, 36 in × 80 in | $500–$1,500 | $300–$600 | $800–$2,100 |
| Steel exterior/entry door, 36 in × 80 in (budget) | $200–$600 | $250–$500 | $450–$1,100 |
| Wood or wood-clad exterior entry door, 36 in × 80 in | $1,000–$3,500 | $400–$800 | $1,400–$4,300 |
Opening modifications (enlarging or reducing a rough opening) add $500 to $2,500 or more depending on whether the wall is load-bearing and whether a new structural header is needed. If you're going wider than 72 in in a load-bearing wall, budget for a structural engineer review ($300 to $700 in most markets) and a proper engineered LVL or steel beam header. This is not optional and skipping it creates liability and future structural problems.
DIY installation is realistic for a same-size replacement sliding or French patio door in a non-load-bearing wall if you're comfortable with framing, shimming, and flashing. The biggest DIY risk is getting the sill pan flashing wrong: an improperly installed sill pan voids most manufacturer warranties and can cause thousands of dollars of hidden rot damage within five years. If you're unsure, hire a professional at minimum for the water management steps.
Screens, coverings, locks, and hardware
Patio doors open up your home, which means bugs, sun, and visibility become immediate practical concerns. Full-width retractable screen systems (from brands like Phantom, Larson, and Andersen's integrated options) mount inside the frame and roll to one side when not in use. They work well with sliding doors; French door retractable screens are slightly more complicated since both panels need independent screens. For bifold and multi-slide systems, pleated or folding screen systems are available but add to project cost.
Covering options include sliding panel track blinds (designed to sit inside the frame between glass and interior), cellular shades (excellent for insulation and privacy), and exterior solar shades if the door faces south or west. Vertical blinds are the traditional choice but look dated; most homeowners replacing them now go with a panel track or motorized roller shade system.
For hardware and security: upgrade the standard latch that comes with most sliding patio doors to a keyed lock with a multi-point engagement mechanism. Add a secondary track bar for sliding doors. For French patio doors, a three-point multipoint lock set (Emtek, Schlage, and Andersen all offer compatible options) is worth the extra $100 to $300 over the included hardware. Look for ANSI/BHMA Grade 1 or Grade 2 rated hardware for durability.
Maintenance and upgrades worth doing
Sliding door tracks are the most neglected maintenance item in most homes. Clean and lubricate the track with a silicone-based lubricant (not WD-40, which attracts dirt) every six months. Check the weatherstripping annually and replace it when you can feel air movement around the frame in winter. For wood or wood-clad doors, inspect and refinish the exterior surface every three to five years; bare wood exposed to sun and moisture will crack within a few seasons.
Energy upgrades worth considering on existing patio doors: adding secondary low-E film to the interior glass surface costs $5 to $15 per square foot installed and can drop solar heat gain noticeably. Replacing worn door sweeps and threshold seals is a $20 to $80 DIY fix that often eliminates noticeable drafts. If your existing sliding door unit is more than 20 years old with single-pane glass, replacement is almost always more cost-effective than upgrading in place.
Your buying checklist before you order anything
Before you finalize a patio door or exterior door purchase, run through this checklist. It's the same set of questions I work through with anyone planning a door project, and skipping even one step tends to create expensive problems downstream. For a deeper dive into any of these points, the patio door buying guide in this series covers each one in detail.
- Confirm whether the wall is load-bearing and whether the current header can handle the planned door width.
- Measure the rough opening at three heights and three widths; record the smallest dimensions.
- Verify the wall thickness and confirm the door unit's jamb depth matches.
- Determine the step-down height from threshold to patio surface and confirm it's within the 7.75 in IRC limit, or plan landings/steps accordingly.
- Check local energy code requirements for U-factor and SHGC (fenestration compliance for glazed doors).
- Confirm egress compliance: at least one exterior door must meet IRC R311.2 (32 in minimum clear width, 78 in clear height, openable from inside without a key).
- Decide on inswing vs. outswing (French/hinged) or sliding vs. bifold based on clearance and traffic patterns.
- Choose material (vinyl, fiberglass, aluminum, wood, or clad) based on climate, budget, and maintenance tolerance.
- Verify the NFRC label or ENERGY STAR certification on any unit you're considering.
- Plan sill pan flashing per ASTM E2112 before ordering — confirm the installer's flashing method or source materials if DIYing.
- Budget for screen system, covering, and hardware upgrades separately from the door unit cost.
- Get at least two installation quotes if hiring out; ask specifically how they handle sill pan flashing and warranty documentation.
The patio door examples in this series show real-world installs with different configurations if you want to see how these decisions play out in practice. The single most important thing I'd tell any homeowner: don't let the door unit price anchor your total budget. Installation, flashing, header work, and threshold corrections often add 50% or more to the door cost itself. Plan for the full number, not just the sticker on the box.
FAQ
What code and safety standards must I know when comparing patio doors and exterior/entry doors?
Key standards: IRC R311.2 (egress door minimums: clear width 32 in at 90°, clear height 78 in, readily openable from inside without key); IRC R311.3 landing requirements and common exception for threshold height; ASTM E2112 (installation practice, sill‑pan flashing and WRB integration); ADA 2010 thresholds/bevel limits (½ in max for accessible routes, ¾ in conditional); NFRC labeling/testing requirements for glazed door U‑factor/SHGC/VT; ENERGY STAR program definitions and any air‑leakage/performance references (AAMA/WDMA/CSA or NFRC 400). Use these for egress, accessibility, energy code and installation best practice compliance.
What measurements and sizing standards are essential for homeowners?
Measure existing door frame and rough opening: common single entry door nominal 36×80 in (others 32×80, 30×80); common sliding patio door stock widths: 60", 72", 96" with heights typically 80" or 96". Allow 1.5–2.0 in extra in rough opening (width and height) for shimming/insulation. For egress compliance, ensure clear opening ≥32 in and height ≥78 in. For accessibility, keep thresholds ≤½ in or beveled per ADA. Follow manufacturer tolerance tables for prehung units.
What installation practices affect weatherproofing and durability?
Follow ASTM E2112 and manufacturer instructions: install a continuous sill pan with end dams, integrate with house WRB, provide head/jamb flashings, slope/weep the sill to exterior, set unit square/plumb, use correct shim locations (typically ~2 in from jambs), insulate gaps, and provide proper exterior sealant and trim. Incorrect sill/pan or flashing is a leading cause of leaks and warranty denial.
How do thresholds and step‑downs to patios affect door choice and code?
Codes require level landings for egress doors; some code adoptions permit up to ~7 3/4 in drop below threshold depending on swing and exceptions. Accessibility standards limit threshold height for accessible routes (½ in max or beveled conditions). For patios with step‑downs, choose doors and thresholds that maintain egress/accessible paths or add compliant ramps/landings. Consider low‑profile thresholds or exterior adjustable sill solutions for sliding doors to reduce trip hazards while maintaining water resistance.
What are typical energy and air‑performance metrics to compare?
Look for NFRC labels for U‑factor (lower = better insulation), SHGC (solar heat gain coefficient), and VT (visible transmittance). ENERGY STAR criteria vary by climate zone—check local requirements. Air leakage tested per ASTM E283/NFRC 400: ENERGY STAR/standards reference limits (swinging doors ~≤0.5 cfm/ft²). For glazed patio doors, treat units as fenestration (many codes apply fenestration U‑factor/SHGC limits when glass area ≥25%).
What are the main style options and their trade‑offs?
Sliding (two‑panel): saves swing space, lower cost, smaller clear opening than unit width, easier screen integration. French/hinged doors: can provide full opening when both leaves open, classic look, may require swing clearance; outswing can reduce interior floor threshold height. Multi‑slide/bifold/folding (LaCantina, NanaWall): provide very wide openings and nearly wall‑width access but cost more, may require engineered headers and greater installation complexity. Choose by desired clear opening, aesthetics, maintenance, and budget.