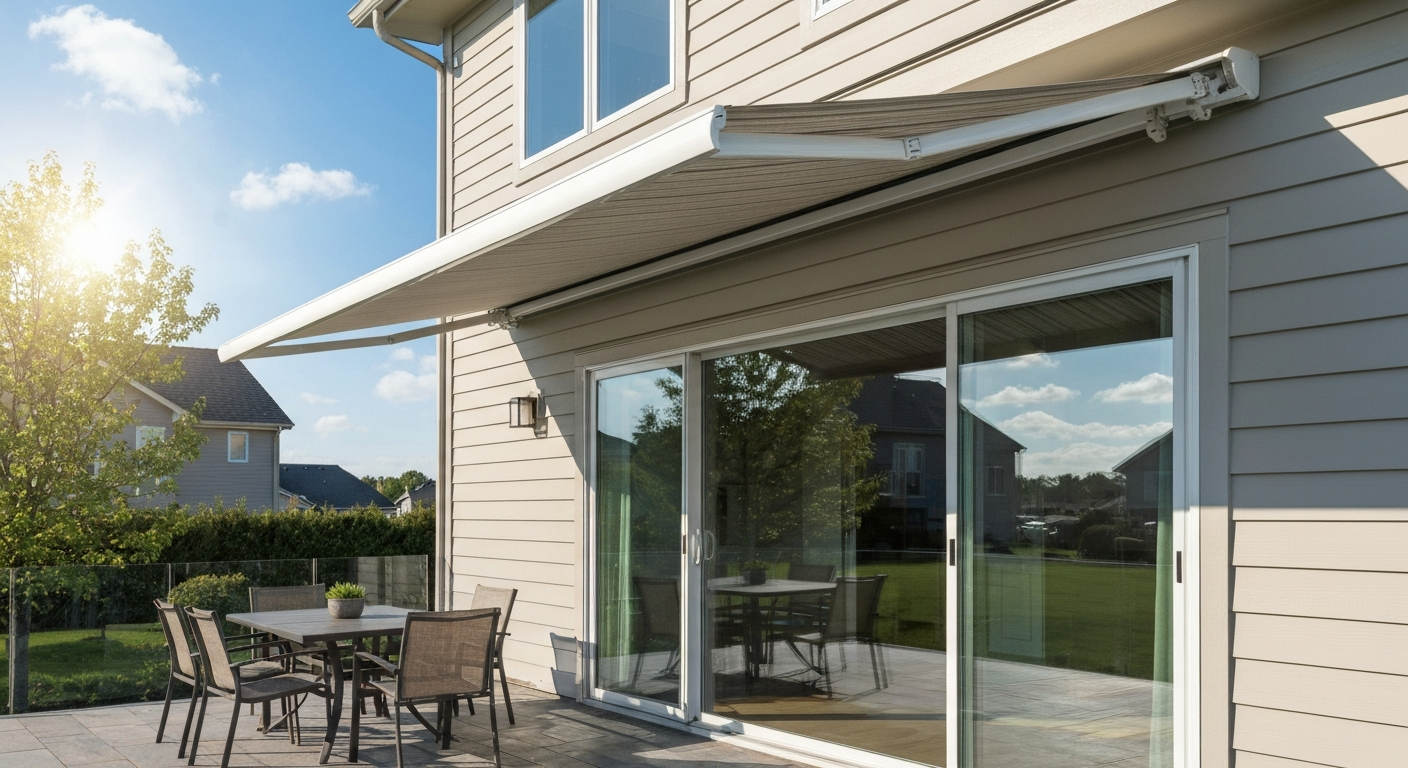
Manual louvered patio covers are aluminum roof systems made of rotating blades you adjust by hand, using a crank or lever, to dial in shade, airflow, or full rain protection. They suit homeowners who want serious weather control over a patio without the cost or complexity of a motorized system, and they work especially well when your patio door opens directly onto the covered space. If you can swing a $8,000–$20,000 installed budget for a mid-size patio (roughly 150–300 sq ft), a manual louvered cover is one of the most durable, versatile options available.
Manual Louvered Patio Covers: Homeowner Buying & Care Guide

Owen Delaney
24 Jul 2026
What manual louvered patio covers are and who they actually suit
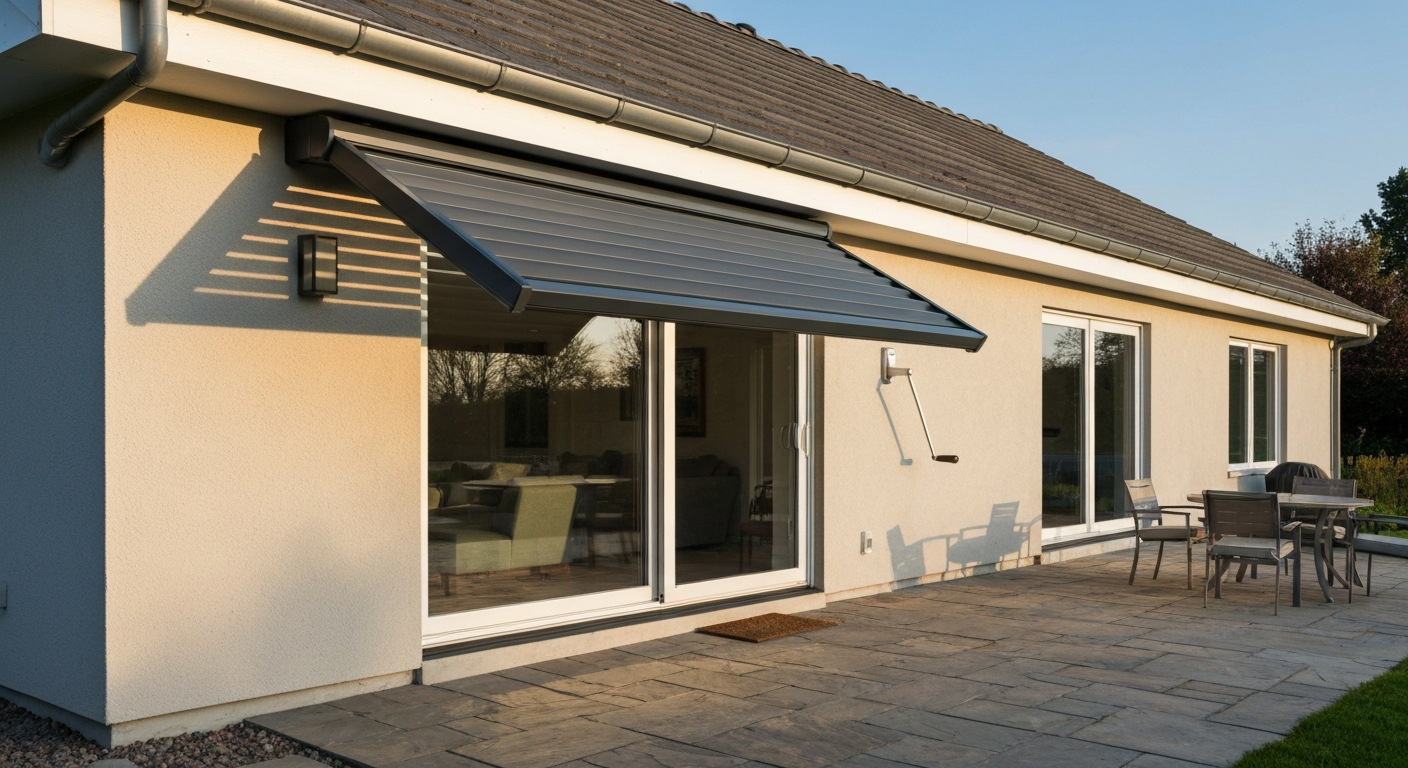
A manual louvered patio cover is essentially a low-slope roof with blades you control. The louvers (typically 4–6 inches wide) span between structural beams, and rotating them open or closed takes maybe 15 seconds with a hand crank or pull rod. When fully closed, the overlapping blades shed rain into integrated gutters built into the perimeter frame. When open, you get full ventilation. That simple mechanical design is the reason these systems have been around for decades and why brands like Renson (Camargue) and StruXure have built entire product lines around the concept.
They suit homeowners who check most of these boxes: you want a permanent, attached structure rather than a portable shade solution; your patio is large enough to justify a structural roof (100 sq ft and up); you live somewhere with real weather (intense sun, afternoon rain, modest snow); and you want the aesthetic of a clean aluminum pergola without paying the premium for a motorized system. They are less ideal if you're renting, if your patio is tiny, or if your HOA or local code makes permitting painful for attached structures.
How the system works: the parts you actually interact with
Every manual louvered cover shares the same basic anatomy. Understanding it helps you ask smarter questions when you get quotes.
- Louver blades: The rotating aluminum slats that form the roof surface. They pivot on a shared axle running across the span of the structure.
- Drive rod or crank: The manual control mechanism. A push-pull rod or hand crank rotates all blades simultaneously through a linked gear or rod assembly at one end of the frame.
- Perimeter frame and beams: Extruded aluminum sections that carry the structural load and house the integrated gutter channels along the eave edges.
- Integrated gutters: Channels inside the frame perimeter that collect and redirect rainwater when louvers are closed. Downspout locations are chosen during design.
- Posts or columns: Freestanding systems use four or more columns; wall-attached systems mount one end to the house via a ledger bracket and use two front columns.
- Ledger attachment: For wall-mounted installs, a structural bracket or ledger plate anchors the cover to the house framing, not just the sheathing.
- Footings: Front columns typically require concrete footings, sized to local frost depth and load requirements.
When you turn the crank or push the rod, a control arm rotates a drive shaft that runs along one beam, and every louver blade rotates together. Quality systems have positive stops at fully open and fully closed so you're not guessing at blade position. Renson's Camargue technical sheets, for example, specify the exact column configurations and maximum unsupported spans, which tells you how many posts your design will need and where they land relative to your patio door and pathways.
Material and finish options: what you're actually buying
Almost every manual louvered cover on the market uses extruded aluminum for the frame and blades. Aluminum doesn't rot, resists corrosion well, and takes powder-coat finishes that last 15–20 years with reasonable care. A few points worth knowing when you're comparing quotes:
- Powder-coat finish: The standard finish on virtually every aluminum louvered cover. Look for AAMA 2604 or 2605 rated coatings — the 2605 rating offers better long-term gloss and chalk resistance, which matters in high-UV climates like Arizona or Southern California.
- Wood-look finishes: Several manufacturers offer woodgrain powder-coat or PVC wrap over aluminum extrusions to mimic timber beams. They look convincing at a distance and cost roughly 10–20% more than standard colors.
- Standard colors: Whites, tans, bronze, and dark charcoal are universal. Custom RAL colors are available from most brands but add lead time and sometimes a surcharge.
- Louver blade profiles: Blades vary in width (typically 4 to 8 inches) and cross-sectional shape. Wider blades span farther between beams but may feel visually heavier. Curved or aerofoil profiles shed water more efficiently at partial-open positions.
- Frame wall thickness: Thicker extrusions handle longer spans and higher snow/wind loads. Ask for the spec sheet, not just a brochure photo.
For most homes in temperate and hot climates, a standard aluminum powder-coat system in white or bronze is the right call. Wood-look finishes are worth considering if your home has a lot of natural wood trim and you want the cover to blend in. Avoid systems that spec out thin-wall extrusions without published load ratings, the price will look attractive but the structure won't hold up to a real snow year or sustained wind event.
Sizing rules and compatibility with patio door openings
Getting the sizing right is where I see homeowners make the most expensive mistakes. A cover that's too shallow doesn't actually shade your patio door glass in the afternoon, and one that's sized without accounting for door swing or screen clearance creates daily headaches.
Projection depth
The rule of thumb is that your cover's projection (how far it extends from the house) should be at least as wide as the patio itself. For a standard 10-foot-deep patio, plan for at least 10 feet of projection. If your goal is to keep the patio door area shaded during afternoon hours, add 2–3 feet. Most manufacturers offer projection depths from 8 feet to 20+ feet in standard configurations, with longer spans requiring additional structural beams or closer column spacing.
Headroom and door clearance
Standard patio door frames top out at 80 to 96 inches (6.67 to 8 feet). The ledger for your louvered cover attaches to the wall above the door, so the finished underside of the cover's perimeter beam needs to clear the door header with enough room to not feel claustrophobic and to allow the door to open without the screen or door panel contacting the structure. I'd call 84 inches of clear height at the wall a practical minimum, and 90–96 inches is better. If you have a transom window above your patio door, you'll need to work around that in your ledger placement, or mount the cover directly to the roof framing above.
Overlap with the door opening
For rain protection, the cover's perimeter beam at the house wall should extend at least 6–12 inches past each side of the door opening. This keeps wind-driven rain from hitting the door frame at an angle. If your patio door is 72 or 96 inches wide (common French and sliding door widths), the cover width should be the door width plus at least 12 inches on each side, so plan on a cover that's at least 8 feet wide for a standard 6-foot slider, and wider is almost always better.
Screen door clearance
If you have or plan to install a patio screen door, the cover's front columns and any apron trim need to be positioned so the screen can open fully without hitting a post. For outswing French doors with a screen on the outside, this means column placement matters a lot. A 36-inch screen door needs 36 inches of clear swing radius. Plan column locations before finalizing your cover width and post positions with your installer.
Integrating the cover with your patio door and house structure
How you attach the cover to the house is the single most important structural and waterproofing decision you'll make. A louvered cover adds real snow load, wind uplift force, and, because it channels water, concentrated drainage at the wall. Done right, the attachment is invisible and dry for 20+ years. Done wrong, you get rot behind the ledger within 5 years.
The standard method is a bolted ledger plate fastened through the house sheathing into the rim joist or wall studs. For wood-framed homes, Simpson Strong-Tie SDS screws or through-bolts with properly spaced lateral load connectors (like the DTT2Z tension tie) are the correct fasteners, not standard wood screws. Simpson Strong‑Tie publishes product pages and technical guidance for the Strong‑Drive® SDS Heavy‑Duty Connector Screw, commonly cited for ledger fastener selection, spacing, and lateral‑load connections when attaching structures to wood‑framed houses Strong‑Drive® SDS Heavy‑Duty Connector Screw (Simpson Strong‑Tie product/tech pages). The ledger itself gets wrapped in self-adhering flashing membrane (products like Grace Vycor Deck Protector or similar butyl-based tapes) before the cover frame is installed, with Z-flashing and correct laps over the wall's water-resistive barrier. This is the step that DIYers most often skip or do halfway, and it's the step that causes thousands of dollars in wall damage later.
Sliding vs. French vs. bifold doors: what changes
For sliding patio doors, the main concern is the screen track at the threshold and whether the cover's front edge creates a low-ceiling feel right at the door. For outswing French doors, clear swing radius for both door panels and any screen door matters more. Bifold doors that fold and stack to the side create a wide opening that works beautifully with a louvered cover, since the covered patio effectively extends the living space, but you need to confirm the cover's sill height doesn't interfere with the fold-stack path of the door panels.
Roofline and flush transitions
If your roof has a low eave directly above the patio, your ledger options may be limited. Some installs require a structural block-out or standoff to bring the cover's top surface flush with (or just below) the eave line for a cleaner visual transition. Renson's engineering notes explicitly state that elevated or non-standard installations require site-specific engineering review, which is worth taking seriously before you assume any configuration will work.
Screens, screen doors, and what this means for your covered patio
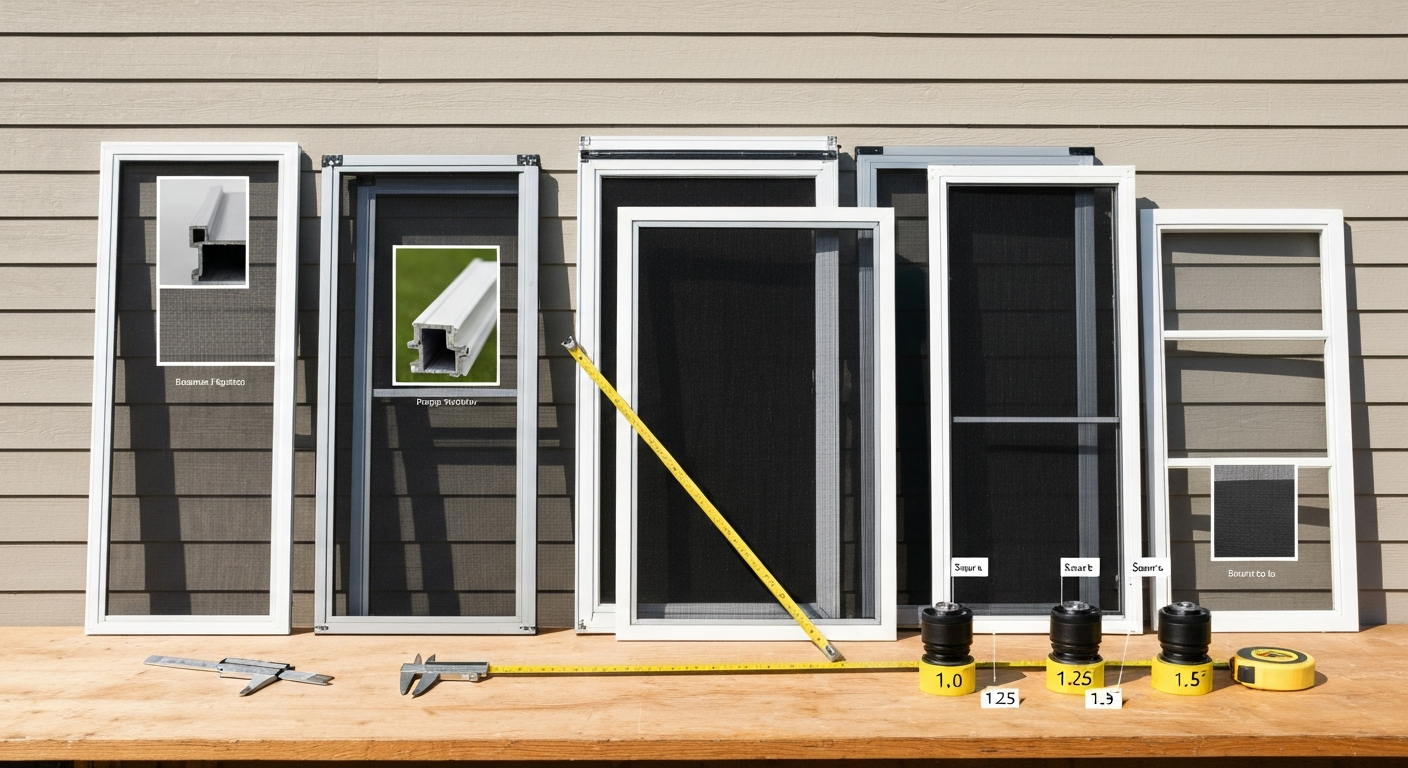
Once you add a louvered cover, your patio effectively becomes a semi-enclosed space, which often makes a screen door or perimeter screening much more desirable. This is where the question of whether patio screen doors are universal comes up, and the honest answer is no, screen doors are sized and configured for specific door frame dimensions and swing directions. A standard 80-inch-tall, 36-inch-wide screen door will not fit a 96-inch French door frame without modification or a door-specific replacement screen.
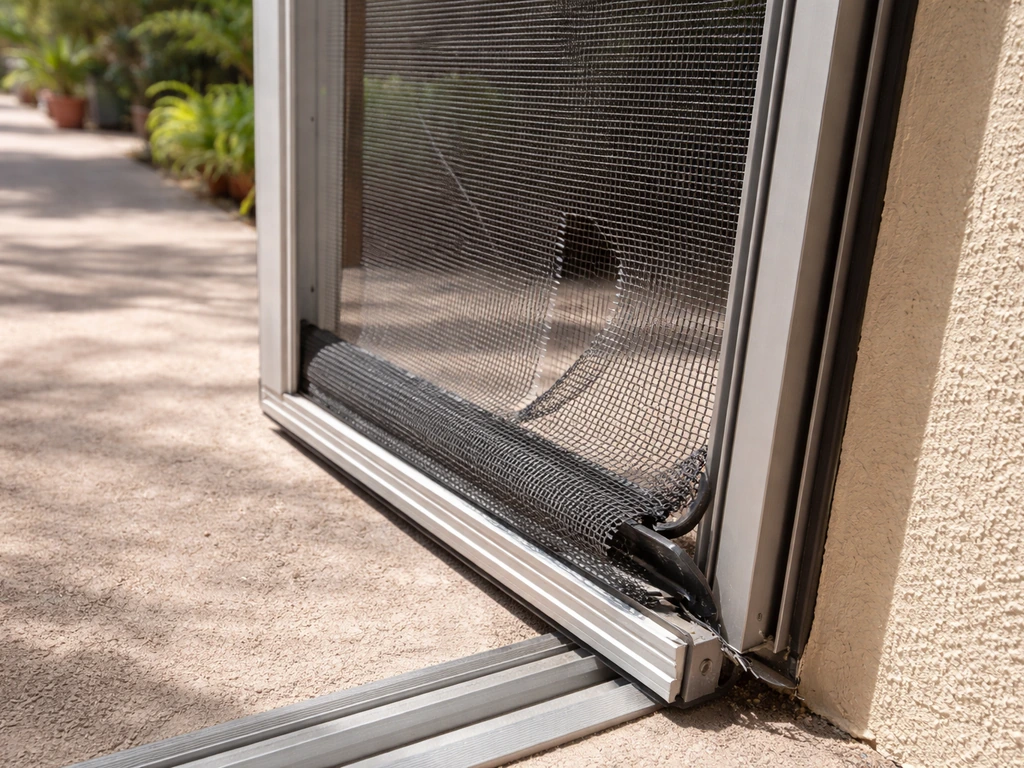
Under a louvered cover, you have more options than a standard door-mounted screen. Retractable side screens that mount to the cover's columns can span the full opening width without relying on the door frame at all. Magnetic screen panels, solar shade roller screens, and fixed insect screens are also worth considering as alternatives to traditional hinged screen doors, especially for wide openings. If you already have a screen door that needs work, getting it repaired or replaced before the cover is installed is smart, since post-install access to the door frame can be tighter.
One practical note: if you're in a warm climate and a screened patio is your main goal, you may find that a combination of a louvered cover plus column-mounted retractable screens actually replaces the need for a patio screen door entirely, since you're screening the whole opening rather than just the door.
How manual louvers stack up against the alternatives
I want to be direct here: every alternative has real strengths. The question is which trade-offs you can live with.
| Cover Type | Weather Control | Wind/Snow Handling | Aesthetics | Lifespan | Installed Cost (150–300 sq ft) | DIY Friendly? |
|---|---|---|---|---|---|---|
| Manual louvered cover | Excellent (fully adjustable) | Good with proper engineering; verify load ratings | Clean, modern aluminum | 20–30 years | $8,000–$25,000 | Not typically |
| Retractable fabric awning | Moderate (shade only; must retract in wind/rain) | Poor to fair; must stow in bad weather | Casual, many colors | 7–15 years (fabric) | $2,000–$8,000 | Partially (mounting) |
| Fixed aluminum/wood pergola | Limited (shade only, open to rain) | Depends on build quality | Classic, versatile | 15–30+ years | $5,000–$20,000 | Sometimes |
| Motorized louvered cover | Excellent + automated sensors | Excellent with engineering | Premium, same as manual | 20–30 years | $15,000–$50,000+ | No |
Retractable awnings
Retractable fabric awnings cost less upfront and are easier to install, but they're fundamentally a fair-weather product. For price comparisons and typical installed ranges, see how much does a retractable patio awning cost to understand upfront and ongoing cost differences. Most manufacturers explicitly recommend retracting them in wind and rain, which means the moment you actually want weather protection, you have to take the shade away. Wind ratings are inconsistently published across brands. A few manufacturers like Sunesta publish Miami-Dade wind test results for specific models, but most consumer-grade awnings don't meet code in high-wind zones without a full engineering review. If you live somewhere with real weather, a manual louvered cover provides dramatically better year-round utility.
Fixed pergolas
A fixed pergola costs less than a louvered cover and provides shade, but it doesn't shed rain and you can't adjust the light level. If you mostly want a structure to hang string lights and grow vines on, a pergola is fine. If you want to actually use your patio during a summer thunderstorm, it won't help.
Motorized louvered covers
Motorized systems (StruXure, Renson Camargue fully motorized, and others) add a motor, control wiring, and often wind/rain sensors that automatically adjust the louvers. The mechanical quality is essentially the same as a manual system from the same brand. The price difference is real though: expect to pay $5,000–$15,000 more on a typical residential install just for the motorization, plus electrical rough-in costs. If you're adding a louvered cover to a patio that's close to your electrical panel and you plan to spend a lot of time out there, motorized is worth serious consideration. If the patio is a secondary space, manual is the sensible choice.
Realistic costs and what drives them
Published consumer guides and installer quotes in 2025–2026 put the installed cost of manual louvered covers at roughly $45–$150 per square foot, with mid-range projects landing around $65–$90/sq ft. Here's what that means in practice for common patio sizes:
| Patio Size | Low Estimate | Mid Estimate | High Estimate |
|---|---|---|---|
| 100 sq ft (10x10) | $4,500 | $7,500 | $15,000 |
| 150 sq ft (10x15) | $6,750 | $11,250 | $22,500 |
| 200 sq ft (10x20) | $9,000 | $15,000 | $30,000 |
| 300 sq ft (15x20) | $13,500 | $22,500 | $45,000 |
The main cost drivers
- System brand and material grade: Entry-level systems from regional suppliers cost less than engineered systems from brands like Renson or StruXure; the difference shows up in wall thickness, published load ratings, and warranty terms.
- Size and span: Larger covers need more material and may require additional intermediate beams or columns, adding both material and labor cost.
- Footings: Concrete footings for front columns can add $300–$800 per column depending on frost depth and soil conditions.
- Ledger attachment and flashing: A straightforward rim joist attachment on a single-story home is relatively simple; complex roofline conditions or brick/stucco walls add labor.
- Permits and engineering: Permit fees range from $150 to $600+ depending on jurisdiction. High-wind or high-snow-load zones (Miami-Dade HVHZ, Upper Midwest, mountain areas) often require stamped engineering drawings, which add $500–$2,000.
- Labor market: Labor in Phoenix or Atlanta is typically cheaper than in Los Angeles or New York metro. Regional installer pricing varies by 30–50%.
- Finish upgrades: Wood-look finishes, premium colors, or wider blade profiles add 10–20% to material cost.
DIY vs. professional installation and what permits you'll likely need
I'll be blunt: manual louvered covers are not a realistic DIY project for most homeowners. The structural ledger attachment, footing excavation, and correct flashing work require trade skills and, in many jurisdictions, a licensed contractor to pull the permit. That said, here's how to think about it.
Under the International Residential Code and most local adoptions, attached patio covers are generally permit-required. Some jurisdictions exempt detached accessory structures under roughly 200 square feet, but an attached louvered cover that connects to your house almost never qualifies for that exemption, the attachment to the home's structure triggers a permit requirement in most places. Portland, for example, exempts patio covers up to 200 sq ft attached to a building from some requirements but still wants a zoning check; San Diego and Encinitas publish their own patio cover permit bulletins with local submittal checklists. The bottom line: call your local building department before you order anything.
In hurricane or high-wind zones, particularly Miami-Dade and Broward counties in Florida, where the High-Velocity Hurricane Zone (HVHZ) rules apply, louvered roof structures must be engineered to meet Florida Building Code criteria, with stamped drawings. South Florida installers are used to this, but it adds both time and cost. ASCE 7 governs snow and wind load design nationally; your engineer will reference it when sizing your ledger connections and column footings.
Maintenance, common repairs, and keeping things running
Manual louvered covers are low-maintenance compared to wood structures or fabric awnings, but they're not zero-maintenance. Both Renson and StruXure publish detailed care guides, and the key tasks come up twice a year.
- Clear the integrated gutters: Leaves, pine needles, and debris accumulate in the perimeter gutter channels. Rinse them out each spring and fall. A blocked gutter will overflow onto the house wall and potentially behind your ledger flashing.
- Rinse the louver blades: A garden hose works well. Most manufacturers cap pressure washing at a specified PSI (often 1,200–1,500 PSI max) to avoid damaging the powder-coat or forcing water into the blade pivot seals.
- Lubricate the drive rod mechanism: A light application of silicone or PTFE spray on the crank mechanism and pivot points each year keeps the manual operation smooth. Do not use oil-based lubricants that attract dust.
- Inspect the ledger attachment: Once a year, look at the wall behind the cover's top beam. Any bubbling paint, soft spots, or water staining near the ledger indicates flashing failure — address it immediately.
- Check blade pivot seals: Over time (typically 10–15 years), the rubber or silicone seals at blade pivot points can harden and crack. Replacement seal kits are available from most manufacturers.
- Touch up powder-coat: Small chips or scratches from ladder contact or debris impact can be touched up with manufacturer-supplied touch-up paint. Left untreated, bare aluminum will oxidize and look patchy.
For anything beyond routine cleaning, a stuck crank mechanism, a bent louver blade after a branch impact, or a compromised ledger connection, call the installing contractor or a local aluminum structure specialist. Finding local service is usually easiest by contacting the brand's dealer locator (StruXure and Renson both maintain dealer networks) or searching for licensed patio cover contractors in your area who are familiar with the specific brand you have installed.
Weather, wind, and climate considerations
Climate is genuinely the deciding factor between a manual louvered cover and its alternatives for many homeowners. Here's how to think about it by region: Regional dealer sites like Royal Covers, Patio covers & pergolas (Phoenix installer example) publish local pricing guidance and call out climate drivers (Arizona desert heat, wind and permit considerations) to illustrate how installation methods and costs vary by market Royal Covers — Patio covers & pergolas (Phoenix installer example).
- Hot, dry climates (Phoenix, Las Vegas, inland Southern California): Sun control is the primary driver. A louvered cover with blades angled to block afternoon western sun makes the patio genuinely usable in summer. Powder-coat durability matters more here than anywhere else due to UV intensity.
- Warm, humid climates with afternoon rain (Florida, Gulf Coast, Southeast): Rain-shedding is critical. Louvered covers with properly engineered integrated gutters handle daily afternoon storms well. In Florida, verify HVHZ compliance if you're in the applicable zone.
- Upper Midwest and mountain regions (Minnesota, Colorado, mountain West): Snow load is the design driver. Ask for published snow-load tables from your manufacturer and make sure your local design loads are within the system's rated capacity. Renson publishes a snow-load table in its Camargue technical sheets.
- Pacific Northwest and Northern California: Wind and rain are primary concerns. Lateral attachment to the house needs to be solid, and gutter drainage needs to handle sustained high-volume rainfall.
- High-wind coastal areas: Verify published wind ratings. Not all manual systems have wind ratings tested to the same standard. An engineered attachment with proper lateral connectors is non-negotiable.
Your decision checklist before you buy
Before you call a single installer, work through this list. It will save you from expensive surprises and make your conversations with contractors much more productive.
- Measure your patio dimensions (length, depth, and ceiling height at the wall) and identify where columns can land without blocking pathways or door swing.
- Check your local building department's website for patio cover permit requirements and submittal checklists before ordering.
- Identify whether your home is in a high-wind, high-snow, or hurricane zone — this affects engineering requirements and system selection.
- Confirm your patio door type (sliding, French, bifold) and note the rough opening width and header height so you can communicate clearance requirements to installers.
- Decide whether you want column-mounted retractable screens or other screening options integrated with the cover structure.
- Get at least three installed quotes from licensed contractors who specify the brand, material gauge, published load ratings, and warranty terms in writing.
- Ask each installer what their flashing and waterproofing detail looks like at the ledger — if they can't describe it clearly, move on.
- Confirm whether the quoted price includes permit fees, footing excavation, and any electrical rough-in (even if you plan to keep the system manual, pre-running a conduit for a future motor upgrade is inexpensive at install time).
- Check the manufacturer's warranty: what does it cover, for how long, and is it transferable if you sell the house?
FAQ
What core technical descriptions and manufacturer documentation should be collected to explain how manual louvered patio covers operate and what their parts are?
Collect manufacturer product brochures, technical specification sheets, installation manuals, user/operation guides and parts lists from major makers (examples: Renson Camargue, StruXure). These provide verified descriptions of louver/blade geometry, hinge/rotary mechanisms, manual actuation methods (hand‑crank, lever), integrated drainage/gutter paths, post/beam framing, column spacing tables and component part numbers. Source examples: Renson Camargue product and technical PDFs; StruXure Tools & Documents and tech specs pages.
What authoritative structural and code references are needed to size, site‑engineer and permit attached manual louvered patio covers?
Gather the applicable building code references and engineering standards: ASCE 7 (wind and snow load methodology), the locally adopted International Residential Code (IRC/IBC) text for accessory/attached structures (permit triggers and square‑foot thresholds), and local jurisdiction permit bulletins/examples. Use ASCE 7 for load calculations and IRC (Chapter 3) plus local municipal permit pages (examples: Portland, San Diego) to determine when stamped calculations and permits are required.
What installation‑level fastening, ledger and waterproofing details must be verified and what sources back best practice?
Document ledger/attachment practices, required flashing/waterproofing and approved fasteners: use installer/contractor guidance and manufacturer ledger details plus independent best‑practice references. Verify use of self‑adhering flashing membranes under ledgers (Grace Vycor or equivalent), step/Z‑flashing details, and fastener/connector specs (Simpson Strong‑Tie Strong‑Drive and connector tables) for embedment/spacing. Cite trade guidance (Journal of Light Construction article), Simpson Strong‑Tie technical bulletins and contractor installation notes.
What material and style options should be listed and what sources validate material properties and finish care?
List typical materials and finishes: extruded/powder‑coated aluminum (most common), stainless hardware, PVC drainage components, and optional powder‑coat/textured finishes. Validate corrosion resistance, finish warranties and cleaning limits with manufacturer care/maintenance guides (StruXure, Renson) and product spec sheets that state finish warranties and recommended cleaning/pressure‑wash limits.
What sizing and compatibility rules are needed for integrating louvered covers with patio doors and screens?
Provide rules of thumb and verification steps: measure clear opening and threshold heights; allow minimum headroom and setback per manufacturer (collect specific headroom/clearance tables from product docs); confirm column spacing vs. door span and ensure latch/operation clearance for sliding/french/stacking doors. For screens, verify whether screen frames attach to cover posts or to the house — many screens are not fully universal; obtain manufacturer accessory and retrofit compatibility lists. Source: manufacturer installation guides and accessory spec sheets.
What screening and patio‑door compatibility notes should be included (are screens universal? alternatives? repair implications)?
State that screens are not universally compatible — integration depends on post/frame profiles, accessory channels and local installers. Provide alternatives: attach screen enclosures to posts, mount independent retractable screens to door headers, or use insect screen systems designed for the specific pergola brand. Note repair implications: replacing a cover or reconfiguring louvers can require new screen adapters or re‑framing; cite manufacturer accessory lists and local installer product pages.