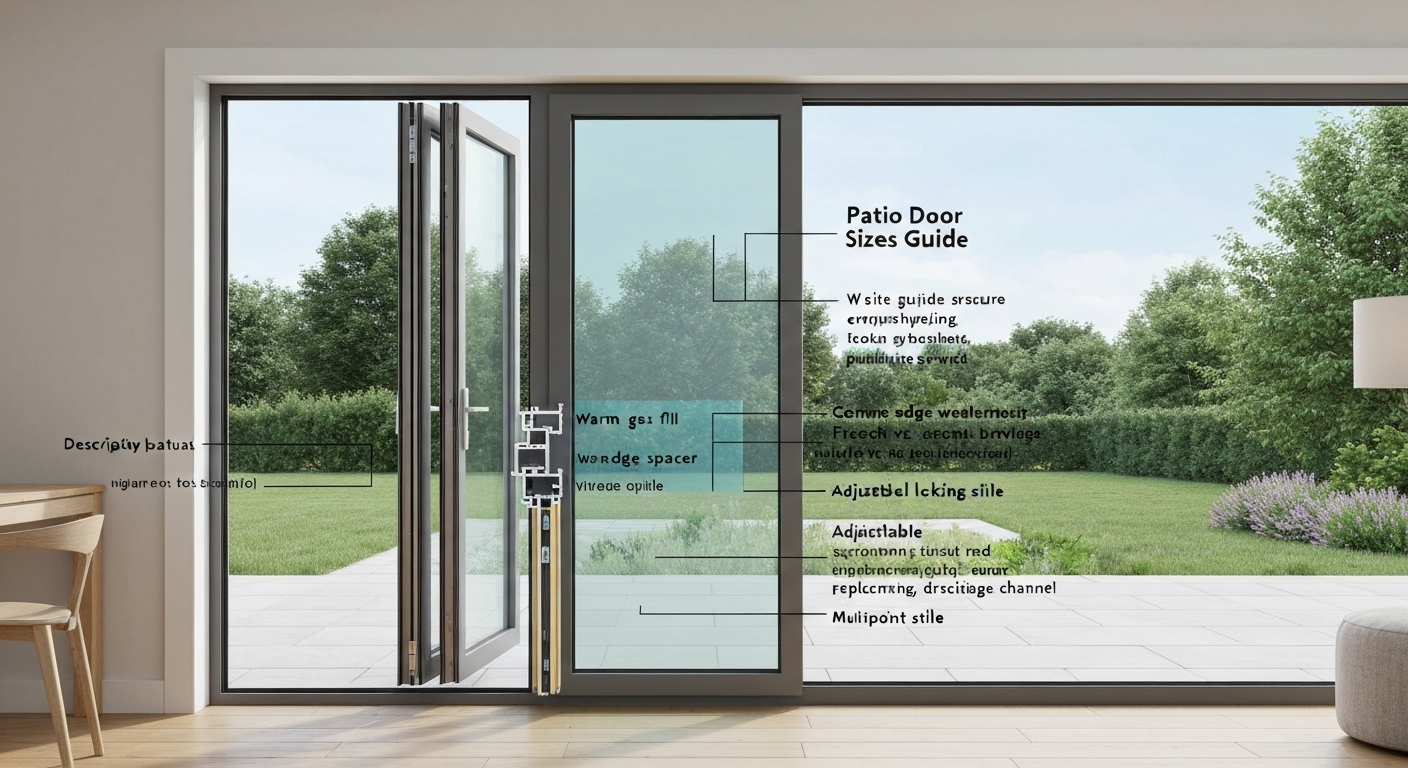
For most patio door setups, a dual-hose portable AC with a universal sliding-door panel insert kit is the best starting point. A 10,000–12,000 BTU (DOE/SACC-rated) dual-hose unit paired with a $20–$40 adjustable panel kit handles the vast majority of single-room cooling jobs without permanently modifying your door or sacrificing much security. If your room is under 350 square feet and you have a standard sliding patio door, that combination is almost certainly enough. Everything else in this guide helps you fine-tune that recommendation to your specific door type, room size, and climate.
Best Portable Air Conditioner for Patio Door: Top Picks

Owen Delaney
12 Aug 2026
Who this guide is for, and what it won't cover
This guide is written for homeowners and renters who already have a sliding, French, or bifold patio door and want to cool one room without doing any permanent construction. Maybe your bedroom sits behind a patio door, your sunroom gets unbearable in July, or your rental agreement rules out window unit brackets. Whatever the reason, the goal here is temporary, reversible, daily-usable cooling through a patio door opening.
What this article won't cover: permanent through-wall installations, central HVAC modifications, or detailed mini-split installation (though we do compare mini-splits as an alternative near the end). It also won't give you a single brand recommendation, because portable AC product lines change faster than any guide can keep up with. Instead, you'll get the sizing criteria, feature set, and compatibility checks that let you evaluate any model on the shelf today.
How portable AC exhaust actually works, and why patio doors are different
A portable air conditioner works by pulling warm room air across its refrigerant coils, cooling the air, and then exhausting the heat it pulled out through a flexible hose to the outside. That hose is the whole problem. Standard portable AC kits ship with a window adapter: a sliding plastic panel designed to fill the gap in a vertically or horizontally sliding window. Patio doors are much taller, and in the case of French or bifold doors, they don't have a track channel that a thin plastic panel can simply drop into. So you need a different adapter strategy for each door type.
Single-hose units draw intake air from inside the room, cool it, and push the hot exhaust outside. The problem is that they create slight negative pressure in the room, which pulls in warm unconditioned air from adjacent spaces or through gaps around the door itself. That makes them work harder. Dual-hose units pull outdoor air in through a second hose to cool the compressor and exhaust through a separate hose, avoiding that negative-pressure issue. The physics matter more when your door seal is imperfect, which is almost always the case with a patio door vent kit.
Compatibility and venting options by patio door type
Sliding patio doors
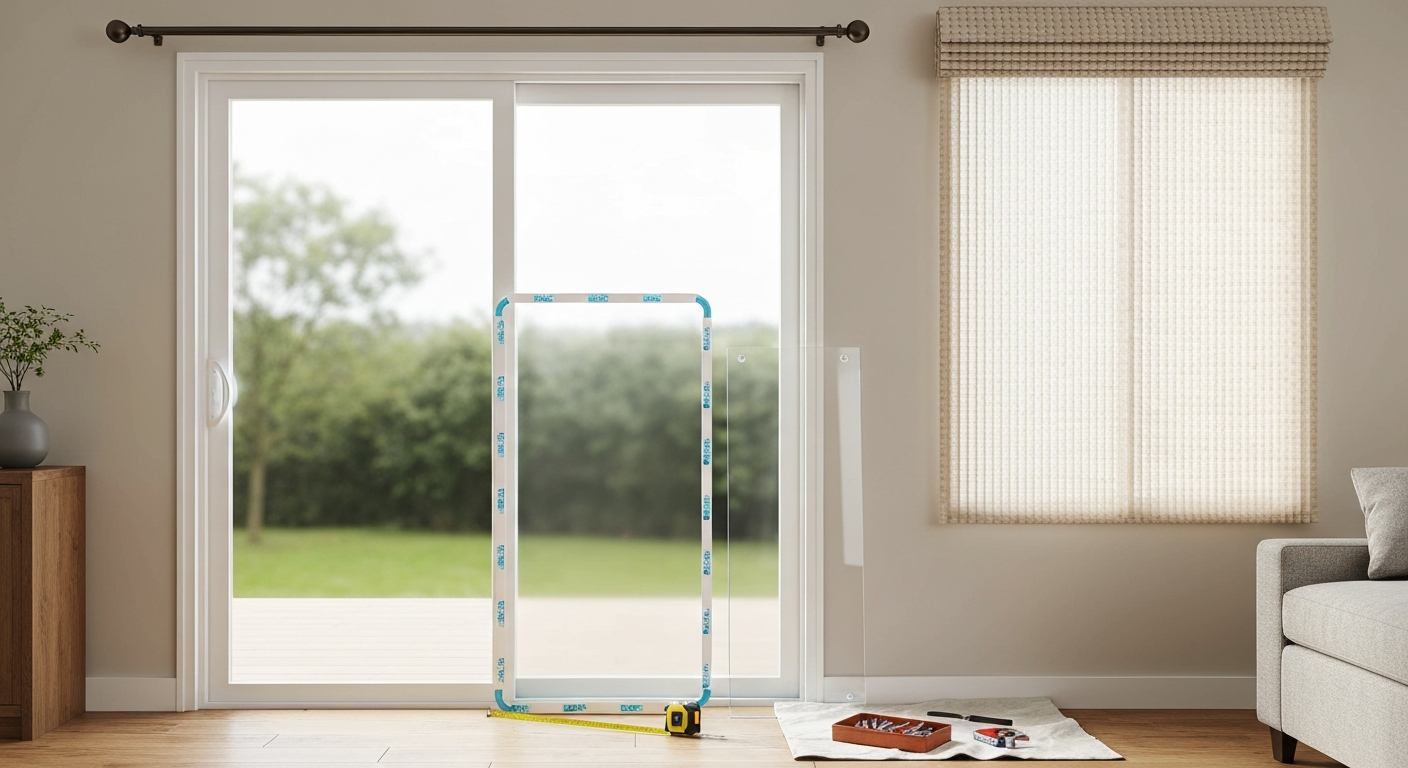
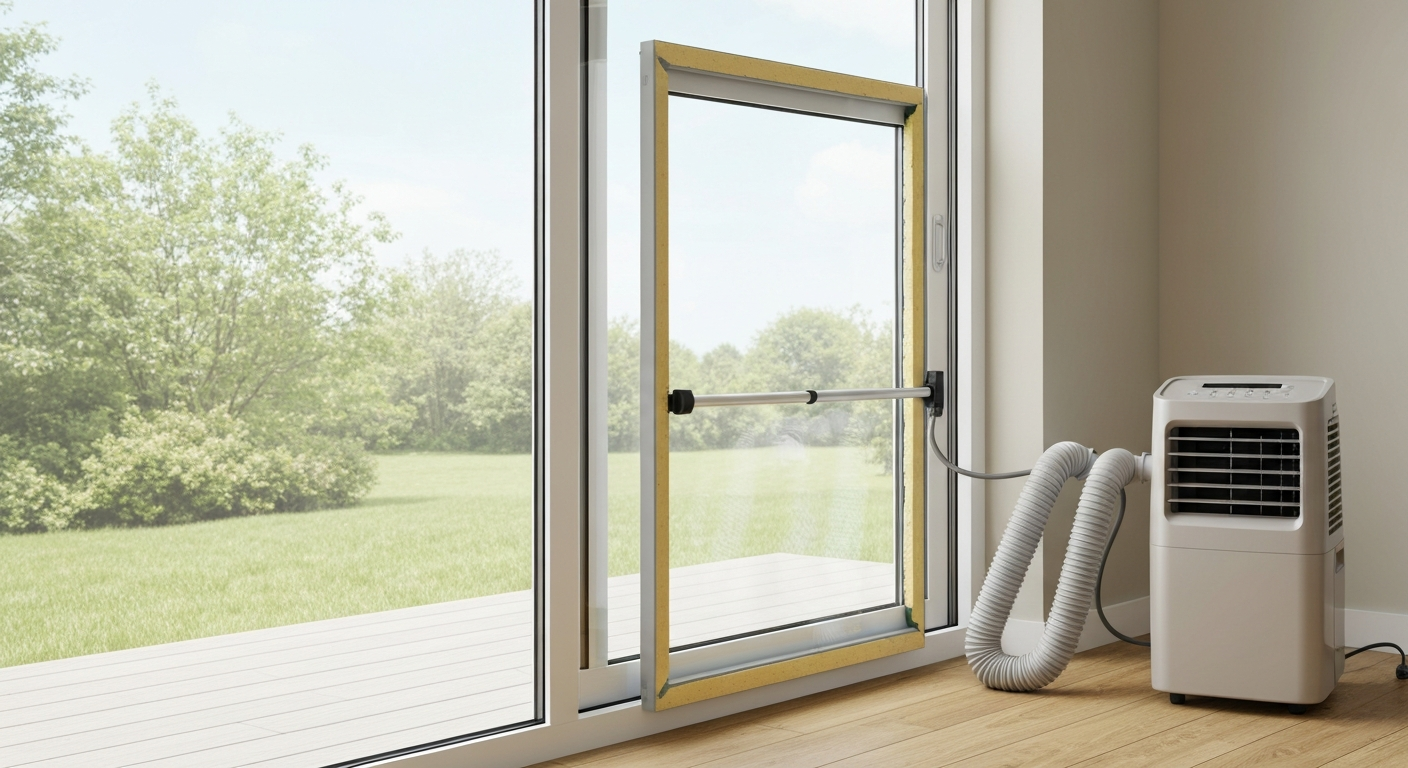
Sliding doors are the easiest to work with. You slide the door open a few inches, insert an adjustable panel kit into the gap, and run the hose through the panel's exhaust port. Commercial adjustable panel kits (typically 28–80 inches wide, 6–8 inches tall) sit in the door track and can be sealed with foam weatherstripping around the edges. The door closes against the panel, and a secondary lock or security bar keeps the door from opening wider. Most standard sliding patio doors are 80 inches tall and 60–72 inches wide, so the gap you're filling is only as wide as you crack the door, usually 5–8 inches.
French patio doors
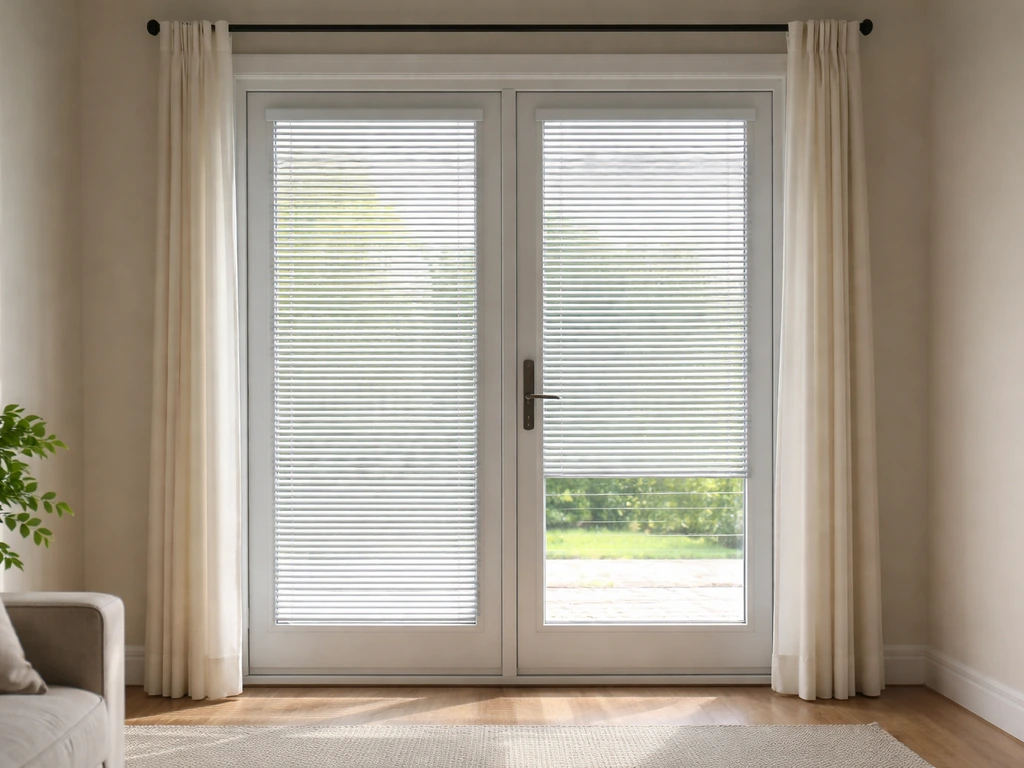
French doors open outward or inward on hinges, which means you can't use the track-mounted panel method. Your options here are: a rigid foam or plywood insert panel cut to fit one door's glass pane, through-glass venting (drilling a 5–6 inch hole in a glass pane, generally only realistic if you're replacing the glass anyway), or a jamb-mounted adapter that mounts in the door frame when the door is held slightly ajar. The panel insert method works best: cut a piece of 2-inch polyisocyanurate foam board or acrylic sheet to the exact glass dimension, cut a hose-diameter hole in it, and hold it in place with foam tape along the frame. It's removable and leaves no permanent marks.
Bifold and other nonstandard doors
Bifold patio doors fold accordion-style and rarely leave a clean rectangular gap when opened. The most practical approach is to open one panel fully, frame the resulting opening with a temporary lightweight panel (plywood, foam board, or a commercial kit designed for large openings) sized to fill the gap, and secure it with removable adhesive or clamps. Because bifold openings tend to be large and irregular, air sealing takes extra work. Budget more time and more foam tape for this type. Through-threshold venting, running a low-profile duct adapter under the door threshold, is a niche option but works well for bifold doors where the floor transition allows it.
Venting method comparison
| Venting Method | Best Door Type | Ease of Install | Seal Quality | Security Impact | Reversibility | Approx. Cost |
|---|---|---|---|---|---|---|
| Panel insert (track-mounted) | Sliding | Easy | Good with foam tape | Moderate (use security bar) | Fully reversible | $20–$50 kit |
| Jamb/through-threshold adapter | Sliding, bifold | Moderate | Fair to good | Low impact if low-profile | Reversible | $30–$80 DIY/kit |
| Rigid panel insert (cut-to-fit) | French, bifold | Moderate | Good if well-sealed | Moderate (door secured ajar) | Fully reversible | $15–$60 materials |
| Through-glass port | French (fixed pane) | Difficult | Excellent once set | No gap needed | Not reversible | $100–$300+ installed |
Sizing and performance: what the specs actually mean
BTU ratings: ASHRAE vs. DOE/SACC, don't get fooled
If you shopped for a portable AC before roughly 2017–2018, you probably remember seeing 14,000 BTU models everywhere. After the Department of Energy updated its test procedures (codified in 10 CFR Part 430, Appendix CC), the same units started showing a lower 'DOE' or 'SACC' rating, often 25–35% lower than the old ASHRAE-method number. The DOE updated its portable‑AC test procedure, codified in eCFR :: 10 CFR Part 430 Subpart B, DOE test procedures (notes on SACC/CEER and AHAM/ANSI incorporation), as Appendix CC to 10 CFR Part 430, establishing the SACC method and CEER metric that manufacturers and labs began adopting in stages around 2017–2018 eCFR :: 10 CFR Part 430 Subpart B — DOE test procedures (notes on SACC/CEER and AHAM/ANSI incorporation). A unit marketed as '14,000 BTU (ASHRAE)' might carry a DOE/SACC rating of around 9,000–10,000 BTU. Always compare using the DOE/SACC number. For a typical 300–400 sq ft room with standard 8-foot ceilings and one patio door, a 10,000–12,000 BTU (DOE/SACC) unit is usually appropriate.
Room factors that push you up in BTU
- Large glazed patio door facing west or south: add 10–15% to your base BTU estimate — glass is a major solar gain contributor, and ASHRAE load calculations account for orientation and shading separately
- Ceiling height over 9 feet: bump up one BTU tier (e.g., from 10,000 to 12,000 DOE/SACC)
- Open-plan space with multiple heat sources (kitchen nearby, multiple occupants): add 600 BTU per additional regular occupant beyond one
- Poor insulation or no weatherstripping on the patio door: assume additional infiltration; a dual-hose unit helps offset this more than upsizing BTU alone
- Sunroom or all-glass room: these load much heavier than a standard bedroom; you may need 14,000+ BTU (DOE/SACC) or two units
Single-hose vs. dual-hose
Consumer Reports lab testing has found that single-hose portable ACs consistently underperform their ratings in real-room tests, largely due to the negative-pressure issue: the unit exhausts conditioned room air along with the heat, so warm outside air infiltrates through every gap in the room envelope. In a well-sealed room that effect is modest, but next to a patio door with an imperfect panel insert, it's significant. Dual-hose units pull in outdoor air for the condenser loop through a separate intake hose, maintaining neutral room pressure. They typically cost $50–$150 more but deliver noticeably better real-world performance in leaky patio-door setups. If you're pairing a portable AC with a patio door installation, dual-hose is worth the premium.
CEER, noise, hose specs, and condensation
The Combined Energy Efficiency Ratio (CEER) is the federal efficiency metric for portable ACs under the updated DOE test procedure. ENERGY STAR-certified portable ACs must meet CEER thresholds that vary by capacity, for example, units under 8,000 BTU (SACC) need a CEER of at least 8. ENERGY STAR's Room Air Conditioners Key Product Criteria lists CEER thresholds by capacity and consumer‑facing sizing guidance Room Air Conditioners Key Product Criteria | ENERGY STAR. 5, while 14,000+ BTU units need at least 6.1 (thresholds as of current ENERGY STAR criteria). A higher CEER means lower electricity cost per BTU of cooling delivered. For operating cost, a 10,000 BTU (SACC)/CEER 8.5 unit running 8 hours a day at a US average rate of roughly $0.16/kWh costs about $0.15–$0.18 per hour, or around $35–$43 per month for summer daily use.
Noise matters if the unit is in a bedroom. Most portable ACs run 52–58 dB on their highest fan setting. Look for units rated at or below 52 dB on the low setting if bedroom use is primary. Hose diameter and length affect efficiency meaningfully: most portable AC exhaust hoses are 5–6 inches in diameter. Manufacturers typically limit hose length to 4–7 feet, and each 90-degree bend adds the pressure-loss equivalent of roughly 10–15 feet of straight hose run (per flexible duct friction principles in ASHRAE guidance). Keep the hose as short and straight as possible. For condensate handling, self-evaporating units that exhaust moisture through the exhaust hose are the most convenient for patio-door use, since you're not drilling a drain into a floor. A condensate pump is worth buying if your unit fills a bucket, because patio-door setups rarely have a floor drain nearby.
The feature set you actually need, and useful accessories
When evaluating models, prioritize this core feature set for a patio-door installation: dual-hose design, self-evaporating condensate, a CEER at or above the ENERGY STAR threshold for its capacity class, a 5–6 inch exhaust port, and a noise rating at or below 52 dB on low. Beyond the unit itself, a few accessories make the difference between a frustrating setup and a reliable one.
- Security bar: a telescoping bar dropped into the patio door track behind the panel insert is the single most important security add-on. It prevents the door from being forced open beyond the panel width even if the lock is compromised. Steel bars adjustable to 28–50 inches cover most sliding door widths.
- Draft stopper / foam weatherstripping: apply self-adhesive closed-cell foam tape around all four edges of your panel insert. 3/8-inch or 1/2-inch foam tape closes most gaps and costs under $10 for a roll large enough for one door.
- Universal vent/panel kit: commercial adjustable panel kits (sold as 'sliding door AC vent kits' or 'patio door AC adapters') are cheaper than fabricating your own and usually include a universal hose coupler that fits 5–6 inch diameter exhaust hoses.
- Condensate pump: if your unit isn't fully self-evaporating and you can't position it near a drain, a $25–$45 mini condensate pump will automatically drain collected water through a small tube you can run through the panel kit.
- Washable filter: most portable ACs include a washable pre-filter. Rinse it every 2–4 weeks during heavy use. A clogged filter can reduce airflow by 20–30% and is the most common cause of weak cooling.
Matching the right unit type to your budget and needs
Rather than pointing at specific model numbers (which change with every product cycle), it's more useful to know what each budget tier typically delivers and where each one makes sense for a patio-door installation.
Compact budget units (under $300, 6,000–8,000 BTU DOE/SACC)
These are almost always single-hose. They're fine for small, well-insulated rooms under 250 square feet where the patio door faces north or east. Don't use them in sunrooms or rooms with poor insulation, the single-hose negative-pressure problem will eat up most of their limited capacity. They typically have manual controls, no programmable timer, and basic condensate trays that need frequent emptying. Good for a bedroom you use a few weeks a year or a secondary space where you want basic comfort on a budget.
Mid-range units (roughly $350–$550, 10,000–14,000 BTU DOE/SACC)
This is where most buyers land, and for good reason. Units in this range often offer a choice between single and dual-hose configurations. They typically include: remote control, programmable timers, auto-restart after power outage, and often Wi-Fi control via an app. Self-evaporating condensate handling becomes common in this tier. These units cover 300–500 sq ft comfortably when properly sized, handle a standard sliding patio door setup well, and last 5–8 years with regular filter cleaning.
High-performance and dual-hose inverter units ($550–$800+)
Inverter-compressor portable ACs modulate their output instead of cycling on and off, which means more consistent temperatures, lower peak energy draw, and quieter operation. They're better suited to large rooms (400–600 sq ft), rooms with heavy solar gain through a large glazed patio door, or situations where the unit runs all day. They tend to have the best CEER scores and the most complete feature sets. If you're spending $600+ on a portable AC, make sure it's dual-hose and inverter-driven, that combination is where the technology earns its price premium.
Before you start: installation checklist and tools
Measure everything before the unit arrives. A few minutes of prep now saves a frustrating return trip to the hardware store.
- Measure the patio door opening height and width (floor to top of frame, and left panel width for sliding doors)
- Measure the door track channel depth (for sliding doors — most are 3/4 to 1 inch wide)
- Measure the exhaust port diameter on the AC unit (typically 5 or 6 inches — confirm before buying a kit)
- Note which direction the door swings or slides, and whether the threshold is flush or raised
- Check clearance on both sides of the patio door: the AC unit needs 12–24 inches of clear space behind it, and the exhaust hose should reach the panel without excess length
- Confirm your outlet type: standard 115V/15A outlets handle most portable ACs, but units above ~14,000 BTU (ASHRAE) may require a 20A circuit
- Have on hand: measuring tape, utility knife, closed-cell foam tape (3/8–1/2 inch), duct tape or foil HVAC tape, a security bar sized to your door track width, and the panel kit (purchased separately or included with the unit)
Step-by-step installation for sliding patio doors
- Slide the patio door open enough to create a gap of about 6–8 inches (the exact width your panel kit requires — check kit dimensions first)
- Insert the adjustable panel kit into the open gap, resting it in the door track. Most kits slide to fill the gap width and lock in place with a thumb screw.
- Run the exhaust hose from the AC unit to the hose coupler port on the panel. Don't exceed the manufacturer's maximum hose length (typically 4–7 feet). Keep the hose as straight as possible.
- For dual-hose units, route the intake hose to a second port on the panel kit or to a separate opening — many universal kits include a second coupler port for this purpose.
- Apply closed-cell foam tape around all four edges of the panel insert where it meets the door frame and the door itself. Press firmly to seat the seal.
- Close the sliding door panel against the insert as firmly as possible without forcing it.
- Drop a steel security bar into the door track behind the panel insert, adjusted to prevent the door from opening any further than the panel gap.
- Power on the unit and let it run 5 minutes, then feel around the panel edges with your hand. Any detectable warm airflow indicates a gap that needs more foam tape.
- Common pitfalls: hose too long (causes back-pressure and reduced efficiency), panel not seated in the track (unit can blow it out), and forgetting the security bar (serious safety issue).
Step-by-step installation for French doors
- Measure the glass pane of one door panel from inside the frame (height and width of the glass area, not the full door leaf).
- Cut a rigid insert panel (2-inch polyiso foam board, acrylic sheet, or plywood) to that exact dimension. Foam board is lightest and easiest to cut with a utility knife.
- Mark and cut a hose-diameter hole (5 or 6 inches, matching your unit's exhaust port) in the center of the insert, roughly 4–6 inches from the top edge.
- For dual-hose units, cut a second hole for the intake hose, spaced at least 4 inches from the exhaust hole.
- Press closed-cell foam tape around all four edges of the insert panel.
- Open the French door, hold the insert against the glass opening, and close the door onto it. The foam edge seal should compress against the door frame, holding the panel in place.
- Use a removable door latch or a folded towel/wedge at the floor to hold the door closed firmly against the insert.
- Connect and route hoses as with the sliding door setup above. Keep them short and straight.
- Through-glass option: if you're replacing a pane anyway, a glazier can install a prefabricated vent panel or drill a 5-inch port during replacement. This is a clean permanent solution but adds $100–$300 to glass costs.
- Jamb-mounted adapter option: some commercial adapters mount in the door jamb and allow the door to close to within 1–2 inches of fully shut, with only the adapter body in the gap. These are more weather-resistant than DIY foam panels.
Step-by-step installation for bifold doors and other nonstandard openings
- Decide which panel section you'll work with and fully open that section to create the widest clean rectangular gap you can.
- Measure the resulting opening (height and usable width after the folded door panels are stacked to one side).
- Build or buy a temporary frame insert sized to fill that opening. A lightweight plywood sheet (1/4–3/8 inch) cut to fit works well; foam board is lighter but less durable over a full season.
- Cut exhaust (and intake if dual-hose) port holes in the panel — same sizing rules as for French doors.
- Seal all edges with foam tape and secure the panel to the frame with removable adhesive strips, small clamps, or bungee cords looped around the door hardware.
- Because bifold openings are rarely truly square, expect to spend extra time on edge sealing. Have extra foam tape on hand.
- For through-threshold venting, use a low-profile duct transition fitting (available from HVAC suppliers) that runs under a raised threshold. This works better on bifold doors than rigid panel inserts when the floor transition is compatible.
- Check the entire perimeter after running the unit for 5 minutes, the same as with sliding doors.
Vent and adapter kits: commercial options vs. DIY
Commercial sliding-door AC vent kits (sold on major retail sites under names like 'patio door AC vent panel' or 'sliding door air conditioner kit') are typically adjustable from about 28 to 80 inches wide and about 6–8 inches tall, made from polypropylene or ABS plastic. They include a universal hose coupler that fits both 5-inch and 6-inch exhaust hoses via a snapping adapter ring. Prices range from $20 to $50. They're worth buying for sliding door installations because the plastic construction holds its shape in the door track better than cut foam board, which can compress or shift over time.
For French or bifold doors where no track exists, DIY foam-board inserts are the best value. Two-inch polyisocyanurate (polyiso) foam board costs about $25–$35 per 4x8-foot sheet at any home improvement store, and one sheet provides enough material for multiple seasons of use. Use a hole saw or sharp utility knife for the hose ports. If you want a more finished look, 1/4-inch acrylic sheet cut to size at a local plastics supplier ($15–$40 depending on pane size) gives a cleaner appearance and is more durable.
Hose diameter and length: confirm your AC unit's exhaust port diameter before buying any kit. The two common sizes are 5 inches and 6 inches. Most commercial kits handle both. Never extend the exhaust hose beyond the manufacturer's stated maximum (usually 5–7 feet). If you must add length, keep the total under 8 feet, use the same or larger diameter, avoid any bends, and insulate the hose with pipe-wrap foam insulation to reduce re-radiation of heat back into the room. Each 90-degree bend can add the pressure equivalent of 10–15 feet of straight duct run, so even one elbow fitting is a meaningful efficiency penalty.
Sealing, insulation, and security after installation
A good install without proper sealing still loses a surprising amount of efficiency. After securing your panel insert and connecting the hose, address these four areas: edge gaps around the panel, the gap where the door meets the panel, the hose itself, and the door's existing weatherstripping.
For temporary seasonal use, shrink-film insulation kits (like those sold for window panes) can be applied over the panel insert and taped to the door frame to create an additional dead-air layer. DOE Building America guidance confirms that air sealing around doors and windows is one of the highest-return-on-investment weatherization steps, reducing both heating and cooling load. When the patio door is in a cold-weather climate, this layer matters even in summer when the unit isn't running, since you're leaving a permanent gap in your door's thermal envelope every night the panel stays in.
Security is the other post-installation priority. A sliding patio door held slightly open by a panel insert is a security vulnerability. A steel telescoping security bar in the floor track, available for $15–$30 at any hardware store, prevents the door from being opened further from outside. For French door installations, a surface-mounted barrel bolt or a rubber door stop wedge under the door is the simplest secondary security measure. If you're in a ground-floor unit or a high-crime area, consider a door alarm sensor on the door itself as an additional deterrent.
For cold-weather and storm considerations: if your region gets summer storms, check your panel insert is secure against wind pressure from outside. Foam-board inserts with no mechanical fastening can blow inward during a strong gust. Add a brace rod or external tape-strip for storm season. In climates where nights cool down significantly, removing the panel and closing the door fully each evening pays back in overnight comfort and lower AC load the next morning.
Coastal and high-humidity environments: what to think about
Salt air is hard on portable AC units. The aluminum fins on the condenser and evaporator coils corrode faster near the ocean, and the plastic and foam components in panel insert kits degrade more quickly in UV-intense coastal environments. If you're within a mile or two of the coast, look for these protective features when selecting a unit: a corrosion-resistant coil coating (sometimes marketed as 'anti-corrosion coating' or 'gold fin' in product specs), a UV-resistant housing, and stainless or plastic-bodied drain components rather than bare metal. For detailed material and hardware recommendations for seaside homes, see our guide on the best patio doors for coastal areas (resource f168dd73-83f6-4c41-bf35-7b3d2aad8cf6).
Maintenance frequency should increase in coastal use: rinse the filter every 2 weeks instead of 4, and inspect the coil fins at the start and end of each season for white or orange corrosion deposits. A light rinse with fresh water and a coil-cleaning spray (available at any HVAC supply) once a season extends coil life significantly. Avoid aluminum foil duct tape in coastal environments, it oxidizes quickly. Use vinyl or cloth-backed HVAC tape instead for all sealing applications.
Foam-board panel inserts also absorb moisture faster in coastal climates. If your DIY insert starts to crumble or de-laminate within a season, switch to a plastic commercial kit or cut your insert from 1/4-inch PVC sheet instead of foam board. PVC handles salt air, moisture, and UV far better and still costs under $30 for a full sheet.
Maintenance and troubleshooting
Regular upkeep
- Clean the air filter every 2–4 weeks during active use (rinse under warm water, let dry fully before reinserting)
- Check and empty the condensate tank if not fully self-evaporating — most units have a float switch that shuts the compressor off when the tank is full
- Inspect the exhaust hose for kinks, cracks, or loose coupler connections at the start of each season
- Wipe the evaporator and condenser coil faces with a soft brush or compressed air at the start and end of each season to remove dust buildup
- Check all foam tape seals on your panel insert monthly during use; the adhesive dries out and the tape compresses over time
Troubleshooting weak cooling
The most common causes of a portable AC that 'barely does anything' are: a clogged filter (check this first, every time), a hose that's too long or kinked (straighten it and shorten if possible), a panel insert with gaps letting hot air back in (feel around the edges with your hand while the unit runs), and a room that's simply too large or too sunny for the unit's rated capacity. Single-hose units in rooms with imperfect patio-door seals can also exhibit this symptom, the negative pressure they create offsets their own cooling by pulling in warm air from elsewhere.
Noisy operation
Rattling or vibrating noises usually come from the exhaust hose hitting a wall or the door frame. Add foam padding where the hose contacts any hard surface. If the unit itself vibrates unusually, make sure it's on a flat, stable floor surface and that the compressor isn't starting under a restriction (clogged filter or kinked hose). A buzzing sound from the exhaust port can indicate the coupler connection isn't fully seated, push it in firmly and twist to lock.
Cost ranges: what to budget for the full setup
| Item | Budget Range | Notes |
|---|---|---|
| Portable AC unit (compact, single-hose, <8,000 BTU SACC) | $200–$290 | Fine for small well-sealed rooms only |
| Portable AC unit (mid-range, 10,000–12,000 BTU SACC) | $350–$550 | Best value for most patio-door setups |
| Portable AC unit (dual-hose inverter, 12,000–14,000 BTU SACC) | $550–$800 | Best performance, worth it for heavy use |
| Commercial sliding-door panel insert kit | $20–$50 | Skip if you have French or bifold doors |
| DIY foam-board insert (materials) | $15–$35 | Best for French/bifold; one sheet covers multiple seasons |
| Closed-cell foam weatherstripping tape | $5–$12 | Budget for two rolls for first-time install |
| Steel security bar for door track | $15–$30 | Non-negotiable for ground-floor installs |
| Condensate pump (if needed) | $25–$45 | Only needed if unit isn't self-evaporating |
| Shrink-film insulation kit (optional) | $12–$25 | Adds secondary thermal layer over panel insert |
| Monthly operating cost (10,000 BTU SACC/CEER 8.5, 8 hrs/day) | $35–$45 | Based on ~$0.16/kWh average rate |
Portable AC vs. window unit vs. mini-split: which makes sense for your patio door?
The honest answer is that portable ACs are a compromise, they're the right choice when a window unit isn't an option and a mini-split isn't in the budget. But the trade-offs are real, and it's worth knowing exactly what you're accepting.
| Option | Upfront Cost | Efficiency (CEER/EER) | Installation | Security Risk | Portability | Best For |
|---|---|---|---|---|---|---|
| Portable AC | $200–$800 | Moderate (CEER 6–9) | No permanent modification | Moderate if panel well-sealed | High — moves room to room | Renters, temporary use, patio doors without viable window access |
| Window unit | $150–$600 | Good (EER 10–12+) | Requires window opening or permanent bracket | Low — fills window opening fully | Low — fixed to window | Double-hung or casement windows; not suitable for patio doors |
| Mini-split (ductless) | $1,500–$4,000+ installed | Excellent (SEER 15–25+) | Requires wall penetration and professional install | None | None — permanently installed | Permanent solution, high-use rooms, best long-term efficiency |
Window units deliver better efficiency per dollar for the same BTU output, but they require a traditional window opening. Patio doors simply don't accommodate them safely. Mini-splits are the best long-term solution if you're cooling the same space every summer and are willing to put $2,000–$4,000 into an installation, their operating cost savings can recoup that investment over 5–8 years in a high-use climate. If you're uncertain about energy performance in your current setup, reviewing your patio door's energy efficiency profile (including glazing type and weatherstripping condition) is a worthwhile first step before deciding between a portable AC and a permanent solution.
Quick-reference checklists
Pre-purchase checklist
- Measured room square footage and ceiling height
- Identified patio door type (sliding, French, bifold)
- Confirmed exhaust hose can reach from planned AC location to door gap without exceeding 7 feet
- Checked BTU using DOE/SACC rating (not old ASHRAE number)
- Verified ENERGY STAR certification and CEER rating
- Decided on single-hose vs. dual-hose based on room seal quality
- Budgeted for panel kit, security bar, foam tape, and condensate pump if needed
Installation checklist
- Panel insert seated in track or frame and adjusted to correct width
- All four panel edges sealed with closed-cell foam tape
- Exhaust hose connected at both ends (unit and panel coupler), no kinks
- Hose length at or under manufacturer maximum
- Second intake hose connected (dual-hose units only)
- Security bar installed in door track
- Unit plugged into dedicated 15A or 20A outlet (check manufacturer spec)
- Test run completed and edges checked for warm air infiltration
Sealing and security checklist
- Foam tape applied and inspected — no visible gaps along panel perimeter
- Security bar prevents door from opening more than the panel gap width
- Hose insulation wrap applied if hose runs through a warm space
- Door's existing weatherstripping checked and replaced if torn or compressed
- Storm bracing added to panel insert if high-wind events expected
Seasonal storage and maintenance checklist
- Filter cleaned and dried before storage
- Condensate tank drained and dried fully
- Exhaust hose detached, straightened, and stored without tight coils
- Coil surfaces brushed clean and inspected for corrosion (coastal users: apply coil protectant spray)
- Panel insert cleaned and stored flat to prevent warping
- Foam tape condition noted — replace if it no longer compresses when pressed
- Unit stored upright in a dry indoor space (never on its side — compressor oil can migrate)
Related topics worth reading on this site
If you're going through the work of setting up a portable AC for a patio door, it's a good time to evaluate the door itself. A patio door with poor glazing or worn weatherstripping adds meaningfully to your cooling load, and to your heating bill in winter. The site's guides on the best patio door insulation kits and how to make patio doors more energy efficient walk through the specific sealing products and glazing upgrades that reduce that load. See our guide on how to make patio doors more energy efficient for step-by-step sealing and glazing upgrade advice. For guidance on reducing noise transfer through your patio door, see our guide to the best soundproof patio doors. See our guide to the best patio doors for insulation for material and hardware recommendations. See the site's guide to the best patio door insulation kit for step-by-step product picks and sealing tips. See our guide “Are patio doors with built-in blinds energy efficient?” to learn how integrated blinds affect glazing performance, solar heat gain, and overall energy use. If your door faces particularly harsh conditions, the guides on best patio doors for cold weather and best patio doors for coastal areas cover material and hardware selection for those climates in detail. For detailed recommendations on materials and hardware for cold climates, see our guide on the best patio doors for cold weather. And if long-term energy efficiency is a priority, the guide on best energy efficient patio doors covers the glazing specs, frame materials, and certifications that matter most when it's time to replace the door entirely.
Final recommendations and safety notes
For most homeowners cooling a single room through a patio door: buy a dual-hose, ENERGY STAR-certified unit rated at 10,000–12,000 BTU (DOE/SACC), pair it with a commercial panel insert kit, seal every edge with closed-cell foam tape, and never skip the security bar. That combination gives you real cooling performance, manageable energy costs, and a setup you can remove completely in the fall without leaving a mark on the door.
A few safety reminders that are easy to overlook: never run the exhaust hose over a door or window threshold in a way that blocks egress, your patio door may be an emergency exit. Keep the area around the unit clear of flammable materials. If the unit trips your circuit breaker on startup, it needs its own dedicated circuit, don't use a multi-tap extension cord. And if you're in a rental, confirm with your landlord that a panel insert kit is permissible before installing, most are, since they leave no permanent modification, but it's worth confirming in writing.
FAQ
What federal test metrics and procedures should I research to accurately report portable‑AC performance (SACC, CEER, AEC)?
Consult the Department of Energy test procedures in 10 CFR Part 430 (Appendix CC/CC1) to define Seasonally Adjusted Cooling Capacity (SACC), Combined Energy Efficiency Ratio (CEER), and how to compute estimated annual energy consumption (AEC) and operating cost. These are authoritative for comparing real, regulatory‑defined performance rather than manufacturer marketing BTU. (Source: eCFR :: 10 CFR Part 430 Subpart B — Appendix CC).
Where do I find consumer‑facing efficiency thresholds and guidance for CEER and sizing?
Use ENERGY STAR Room Air Conditioners product criteria and the ENERGY STAR certified product database to identify CEER breakpoints, labeling conventions, and practical sizing guidance for room units. ENERGY STAR explains thresholds consumers can use to compare models. (Source: ENERGY STAR — Room Air Conditioners Key Product Criteria).
How should I determine correct BTU sizing for rooms with large glazed patio doors (sliding/French/bifold) and what authoritative load‑calculation references are required?
Reference ASHRAE load‑calculation guidance (ASHRAE Handbook chapters on window solar gains) and ACCA/Manual J principles to account for solar heat gain from patio doors, ceiling height, occupancy, and infiltration. These sources provide methods to translate room loads into cooling capacity (BTU) recommendations appropriate for temporary/mobile installations. (Source: ASHRAE Handbook — cooling/load calculations).
What independent lab tests and real‑world performance sources should I use to evaluate noise, real cooling, and single vs dual‑hose behavior?
Cite independent testing from Consumer Reports and Wirecutter (NYT Wirecutter). These organizations provide lab results on real‑room cooling (SACC vs marketed BTU), dBA noise measurements, time‑to‑setpoint, and practical single‑ vs dual‑hose comparisons, useful for explaining real performance tradeoffs. (Sources: Consumer Reports portable AC testing; Wirecutter reviews).
What manufacturer documents and spec items must I extract for any candidate portable AC model?
Collect owner’s manuals and specification sheets from manufacturers to capture: DOE/SACC and marketed BTU, CEER/EER, single vs dual‑hose, exhaust port diameter, shipped hose length and max recommended extension, noise (dBA), condensate handling options (self‑evaporating, pump, bucket), and required clearances. Manuals often include installation cautions and warranty details. (Example sources: Whynter ARC‑14S manual; LG LP1419IVSM support page; Honeywell MN10CES manual).
Which sources explain the regulatory change to DOE/SACC ratings and how to explain discrepancies between older ASHRAE BTU ratings and current DOE numbers?
Use the DOE test procedure references in 10 CFR Part 430 (Appendix CC) and historical notes from AHAM/DOE to describe the 2017–2021 testing change that produced lower DOE/SACC numbers versus older ASHRAE‑based labels. Cite the eCFR reference for regulatory authority. (Source: eCFR :: 10 CFR Part 430 Subpart B).},{